 is here! Shop now, pay later in 4 easy installments


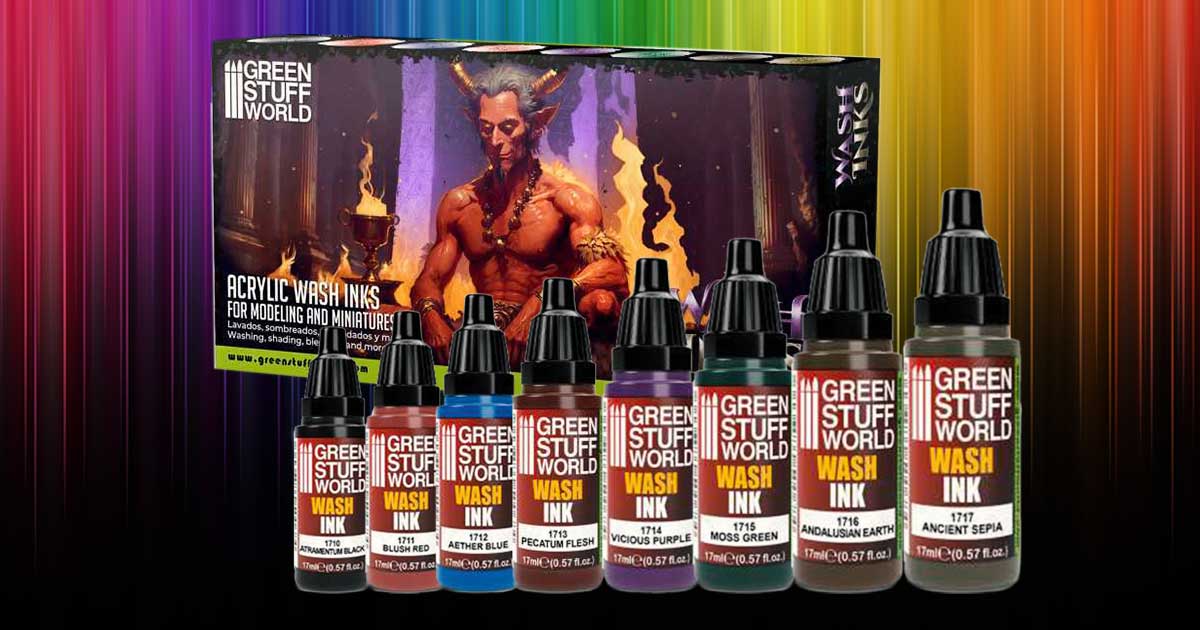
Speed Painting Miniatures with Green Stuff World Wash Inks
We've all been there - staring at a pile of unpainted miniatures, knowing we want them battle-ready but dreading the hours of detailed painting ahead. What if I told you there's a technique that can transform plain white minis into table-worthy pieces with just one or two coats of paint? That's exactly what Green Stuff World wash inks can do for your hobby projects.
After years of helping customers at Hearns Hobbies find faster painting solutions, we've seen the game-changing impact these wash inks have on the tabletop gaming community. The beauty lies in their simplicity - apply over a white base, and watch as the ink flows into every crevice, creating instant contrast and depth. No complex layering, no time-consuming edge highlighting, just quick, effective results that'll get your armies on the table.
The technique I'm sharing today comes straight from our workshop demonstrations, where we regularly show hobbyists how to achieve professional-looking results without the professional time investment. Whether you're painting Kromlech miniatures or working through a backlog of gaming pieces, this method works brilliantly across different model types and scales.
Think of wash inks as liquid talent - they do the hard work of shading for you. Unlike traditional washes that simply darken recesses, Green Stuff World's formula provides rich colour while maintaining transparency in the right places. This means your raised details stay bright while the depths gain dramatic shadows, creating that coveted 'painted by someone who knows what they're doing' look.
Table of Contents
Understanding Green Stuff World Wash Inks
Green Stuff World wash inks aren't your typical hobby paints. These specially formulated inks combine intense pigmentation with perfect flow properties, designed specifically for miniature painting. The water-based formula means they're easy to work with, quick to dry, and won't destroy your brushes if you forget to clean them immediately.
What sets these apart from regular washes is their pigment density. While traditional washes often require multiple coats to build up colour, Green Stuff World inks deliver rich, vibrant results in a single application. The pigments are finely ground and suspended in a medium that encourages capillary action - fancy talk for "it flows into all the tiny details without you having to paint them individually."
The range includes colours perfect for different miniature types. Ancient Sepia creates weathered, aged effects ideal for historical figures or fantasy creatures. Andalusian Earth provides natural brown tones that work brilliantly for leather, wood, and earthen textures. Paititi Flesh, despite its hard-to-pronounce name, delivers exceptional results for skin tones, particularly on Caucasian flesh colours.
These inks excel at what we call 'definition enhancement'. Apply them over a white or light-coloured base, and they naturally settle into recesses while sliding off raised areas. This creates automatic shading and highlighting without any skill required - the physics of liquid flow does all the work. It's like having a tiny artist living in your paint bottle who knows exactly where shadows should go.
![[SUGGESTED IMAGE: Close-up comparison showing miniatures before and after wash ink application]](https://www.hearnshobbies.com/cdn/shop/files/wash-ink-ancient-sepia.jpg?v=1746217730&width=800)
The White Base Technique Explained
The white base technique revolutionised my approach to speed painting, and once you try it, you'll understand why it's become so popular among Australian miniature painters. Start with a clean model primed in pure white - not grey, not off-white, but brilliant white. This creates maximum contrast potential for your wash inks.
For priming, I recommend using a quality white primer or surface primer. The smoother your white base, the better your final results. Some painters use white surfacer for an ultra-smooth finish, which helps the wash flow evenly across the model. Avoid thick primer coats that might obscure fine details - remember, we're relying on those recesses to hold our wash ink.
Here's where it gets interesting. Unlike traditional painting where white primer is just a starting point, with wash inks, that white becomes part of your final colour scheme. The white shows through the translucent ink on raised areas, creating natural highlights. Meanwhile, the ink pools in recesses, creating deep shadows. It's essentially a one-step shading and highlighting technique.
The key is understanding that you're not painting in the traditional sense - you're staining. The white underneath isn't being covered; it's being tinted. This means you can achieve subtle colour variations impossible with opaque paints. Areas where the wash pools become darker and richer, while high points remain lighter, all from a single application.
Pro Tip
For extra-smooth results, give your white-primed models a quick polish with a soft cloth before applying wash inks. This removes any primer texture and helps the ink flow more evenly. Some painters even use a coat of gloss varnish over white primer for ultra-smooth ink flow, though this isn't necessary for most applications.
Choosing the Right Wash Ink Colours
Selecting the right wash ink colour makes the difference between models that look professionally painted and ones that look, well, washed. Each colour in the Green Stuff World range serves specific purposes, and understanding these helps you achieve your desired results quickly.
Ancient Sepia remains my go-to for fantasy creatures, undead, and anything needing an aged appearance. This warm brown tone adds instant character to gaming miniatures, creating the impression of dirt, grime, and centuries of existence. It's particularly effective on bone, parchment, and cloth textures. One coat over white gives you table-ready skeletons or zombies in minutes.
Andalusian Earth provides cooler, more neutral browns perfect for natural materials. Use this for leather armour, wooden weapons, earth elementals, or any model requiring realistic brown tones. The colour has just enough red undertones to avoid looking flat, yet stays neutral enough to work with almost any colour scheme. I've found it excellent for basing materials too - a quick wash over white-primed bases with texture paste creates instant realistic ground.
Paititi Flesh deserves special mention for figure painters. This peachy-pink tone creates surprisingly realistic Caucasian skin when applied over white. The translucency mimics how real skin interacts with light, creating subtle colour variations that opaque paints struggle to achieve. For darker skin tones, try mixing with browns or applying over a tan base coat instead of pure white.
Colour Application Guide
| Wash Ink Colour | Best Used For | Effect Achieved |
|---|---|---|
| Ancient Sepia | Bone, cloth, aged materials | Warm, weathered appearance |
| Andalusian Earth | Leather, wood, natural textures | Neutral, realistic browns |
| Paititi Flesh | Skin tones, flesh areas | Natural, translucent skin effect |
Application Methods for Best Results
The way you apply wash inks determines whether you get smooth, professional results or a blotchy mess. After demonstrating this technique hundreds of times in our Melbourne shop, I've identified the methods that consistently deliver great results, even for beginners.
Start with a loaded brush - and I mean loaded. Wash inks work best when applied generously, allowing gravity and capillary action to do the distribution work. Use a size 2 or 3 round brush for most miniatures. Synthetic brushes work perfectly for this; save your expensive sables for detail work. Load the brush fully and apply the wash from top to bottom, letting it flow naturally into recesses.
Here's where many painters go wrong - they try to paint with wash inks like regular paint. Don't. Instead, think of yourself as flooding the model with controlled amounts of ink. Apply to one section at a time, perhaps an arm or a piece of armour, and let the ink settle for 10-15 seconds. Then, use a damp brush to wick away any excess pooling in unwanted areas. This gives you control without overworking the wash.
Timing matters more than you'd think. Green Stuff World inks have a sweet spot where they're wet enough to manipulate but starting to grab onto the surface. This is usually 30-60 seconds after application, depending on room temperature and humidity. During this window, you can guide pooled ink into recesses or remove it from areas you want to keep lighter. Miss this window and you risk creating tide marks.
For larger models or units, work in sections to maintain control. Complete one area before moving to the next, blending where sections meet while the ink is still workable. This prevents hard edges between sections and maintains a cohesive look across the model. Remember, you can always apply a second coat for deeper colour, but you can't easily remove ink once it's dry.
![[SUGGESTED IMAGE: Step-by-step photos showing wash ink application process on a miniature]](https://www.hearnshobbies.com/cdn/shop/files/wash-ink-pecatum-flesh.jpg?v=1722404141&width=800)
Advanced Speed Painting Techniques
Once you've mastered basic wash application, there's a whole world of advanced techniques that'll take your speed painting to the next level. These methods still keep things quick but add sophistication to your results without significantly increasing painting time.
Selective washing creates focal points and visual interest. Instead of washing the entire model uniformly, apply different wash colours to different areas. For example, use Paititi Flesh on skin, Ancient Sepia on cloth, and Andalusian Earth on leather, all on the same model. The white base unifies the colour scheme while each wash adds distinct character to different materials. This technique works brilliantly for character models where you want more variety.
Pre-shading takes the white base technique further. Before applying wash inks, use a grey primer or thinned grey paint to add shadows in deepest recesses. The wash ink still provides colour, but now you've got even more dramatic contrast. This works especially well for models with deep folds or mechanical details. Just remember to keep the pre-shading subtle - too dark and you'll lose the translucent quality of the wash.
Double-washing creates rich, complex colours impossible with single applications. Apply your first wash, let it dry completely, then apply a second coat strategically. Focus the second application in recesses and shadow areas, avoiding raised surfaces. This builds depth without muddying the highlights. Some painters use different colours for each wash - try Ancient Sepia followed by selective Andalusian Earth for incredibly realistic weathering.
The drybrush-wash-drybrush sandwich technique sounds complex but adds maybe five minutes to your painting time. After your wash dries, do a light drybrush with white or a light colour to restore some highlights. Then apply a very thin second wash to blend everything together. This creates a more refined finish that still counts as speed painting in my book. Perfect for hero models you want to stand out.
Speed Painting Secret
Mix a tiny drop of flow improver or even dish soap into your wash ink to enhance flow properties, especially useful in Australia's dry climate. This helps prevent the ink from drying too quickly and creating unwanted tide marks. Just a tiny amount - we're talking one drop per paint pot.
Common Issues and Solutions
Even experienced painters encounter challenges with wash inks. Understanding common problems and their solutions saves frustration and helps you achieve consistent results across your entire miniature collection.
Pooling in wrong areas tops the list of wash ink frustrations. You want ink settling in recesses, not forming puddles on flat surfaces or raised details. The solution? Keep a clean, damp brush handy as your 'correction brush'. As soon as you spot unwanted pooling, touch the damp brush to the pool - it'll wick up excess ink like magic. Work quickly though; once the ink starts drying, you risk creating marks.
Tide marks or coffee stains happen when wash ink dries unevenly, leaving distinct rings where the ink accumulated. Prevention beats correction here. Avoid overloading flat surfaces with ink, and ensure even distribution before the ink begins drying. If you do get tide marks, sometimes a second thin coat of wash can help blend them out. For stubborn marks, you might need to repaint the area white and start over - annoying but sometimes necessary.
Chalky or streaky finish usually indicates either primer issues or wash ink that's too thick. Some white primers have a chalky texture that becomes apparent under wash. Test your primer-wash combination on a spare model first. If your wash seems thick, add a drop of water or acrylic medium to improve flow. Green Stuff World inks come ready to use, but humidity and temperature can affect consistency.
Colour too light or too dark? This often comes down to the white base preparation. A pure, bright white base yields lighter results, while an off-white or grey-tinged primer creates darker finals. For darker results without changing primer, apply wash more liberally or use two coats. For lighter effects, dilute the wash slightly or work faster to prevent deep pooling. Remember, it's easier to add more colour than remove it.
Quick Fixes
- • Pooling: Damp brush removal
- • Tide marks: Blend with thin second coat
- • Too light: Add selective second wash
- • Too dark: Drybrush highlights back
- • Streaky: Check primer quality
Prevention Tips
- • Test on spare models first
- • Control room temperature
- • Work in good lighting
- • Keep correction brush ready
- • Don't overwork the wash
Project Ideas and Army Applications
The true power of wash ink speed painting reveals itself when tackling entire armies or large projects. This technique transforms overwhelming painting tasks into manageable, even enjoyable experiences. Let me share some project ideas that showcase what's possible.
Undead armies practically beg for the wash ink treatment. Prime your skeletons and zombies white, hit them with Ancient Sepia, and you've got table-ready troops in record time. For variety, use different wash intensities - lighter for recently risen dead, heavier for ancient warriors. Add selective washes of green or purple to suggest decay on zombie flesh. A hundred-model undead horde becomes a weekend project instead of a months-long slog.
Historical miniatures benefit enormously from wash techniques. Andalusian Earth over white creates perfect leather and cloth tones for medieval troops. Ancient Sepia adds authentic ageing to Roman legionaries or Viking raiders. The natural, muted tones these washes create suit historical gaming perfectly. Check out our historical figure range for models that work brilliantly with this technique.
For science fiction projects, combine wash inks with metallic paints for quick, effective results. Prime white, drybrush silver or gold on armour sections, then wash with your chosen ink. The wash settles around the metallic areas, creating definition while tinting the metal. This works great for robotic forces or power-armoured troops.
Batch painting becomes incredibly efficient with wash inks. Set up an assembly line - prime twenty models, wash twenty models, detail twenty models. The quick drying time of Green Stuff World inks means you can work through batches rapidly. I've seen painters complete entire squads in an evening that would typically take weeks with traditional methods.
![[SUGGESTED IMAGE: Gallery showing various completed armies and projects using wash ink techniques]](https://www.hearnshobbies.com/cdn/shop/files/wash-ink-aether-blue.jpg?v=1747082437&width=800)
Comparing with Other Speed Painting Methods
Understanding how wash ink speed painting compares to other quick painting methods helps you choose the right technique for each project. Each method has strengths, but wash inks offer unique advantages for certain applications.
Contrast paints represent the most direct competition to wash inks. While both promise one-coat painting, they work differently. Contrast paints contain heavier pigment loads and behave more like very thin regular paint. Wash inks maintain better transparency and flow properties. For organic textures and natural materials, wash inks often produce more realistic results. Contrast paints excel at bright, bold colours where opacity matters more than subtle shading.
Traditional basecoat-wash-highlight remains the gold standard for quality, but takes significantly longer. Where you might spend 30 minutes per model with traditional techniques, wash ink methods cut this to 5-10 minutes. The trade-off? Maximum quality versus maximum efficiency. For gaming pieces that need to look good at arm's length, wash inks win. For display models or competition pieces, traditional methods still reign supreme.
Drybrushing speed techniques create different effects than wash inks. Drybrushing builds up from dark to light, requiring a dark base and multiple highlight layers. Wash inks work opposite - starting light and adding darks. Combining both techniques yields excellent results; wash ink for base colours and shading, drybrushing for final highlights. This hybrid approach takes slightly longer but produces models that really pop on the tabletop.
Airbrushing offers speed but requires significant investment in equipment and learning. An airbrush can basecoat models quickly, but doesn't automatically create the shading wash inks provide. Many painters combine airbrushed basecoats with wash ink shading for best of both worlds. However, for hobbyists seeking minimal investment and maximum simplicity, wash inks over white primer can't be beat.
Speed Painting Method Comparison
| Method | Time per Model | Best For |
|---|---|---|
| Wash Inks | 5-10 minutes | Organic textures, natural tones |
| Contrast Paints | 10-15 minutes | Bright colours, bold schemes |
| Traditional | 30-60 minutes | Display quality, competitions |
| Drybrushing | 15-20 minutes | Textured surfaces, weathering |
Frequently Asked Questions
Can I use wash inks over colours other than white?
Absolutely! While white provides maximum contrast and brightness, wash inks work over any light colour. Grey primers create moodier, darker results perfect for grimdark aesthetics. Bone or tan primers work brilliantly for desert-themed armies. Even light blues or greens can create interesting effects. Just remember that the base colour will influence your final result - test first on spare models to ensure you like the combination.
How long do Green Stuff World wash inks last once opened?
With proper storage, these inks last years. Keep bottles tightly closed and store them away from direct sunlight and temperature extremes. The dropper bottles help prevent evaporation, but if you notice thickening over time, add a drop of distilled water to restore consistency. Shake well before each use, as pigments can settle during storage. Most painters find a bottle lasts through hundreds of models given how little you need per application.
Do I need to varnish models painted with wash inks?
Varnishing isn't strictly necessary, but it's recommended for gaming pieces that'll see regular handling. Wash inks create a relatively durable finish, but varnish adds protection and can enhance the final appearance. Matt varnish maintains the natural finish, while satin varnish adds subtle sheen that makes colours pop. Apply varnish only after wash inks are completely dry - usually wait 24 hours to be safe.
Can I mix different wash ink colours?
Mixing wash inks opens up endless colour possibilities. The inks blend beautifully, maintaining their transparency and flow properties. Mix Ancient Sepia with Paititi Flesh for warmer skin tones, or add Andalusian Earth to either for deeper shadows. Always mix in a separate container rather than contaminating your original bottles. Test mixed colours on spare bits before committing to important models. Keep notes on successful mixtures for consistency across army projects.
Final Thoughts
Speed painting with Green Stuff World wash inks transformed my approach to army painting, and I reckon it could do the same for you. We've covered everything from basic white-base techniques to advanced applications, but the real magic happens when you put brush to model and see those instant results.
The beauty of this technique lies in its accessibility. Whether you're a time-pressed parent squeezing hobby time between school runs, or someone staring down a mountain of unpainted miniatures, wash inks offer a genuine solution. No airbush investment required, no years of practice needed - just prime white, apply wash, and enjoy the results.
Remember, the goal isn't perfection; it's getting painted models on the table where they belong. Every army starts with a single model, and with wash ink techniques, that army grows faster than ever before. Stop by our Melbourne shop to see these techniques demonstrated in person, or grab some wash inks and start experimenting. Your unpainted pile won't know what hit it.