 is here! Shop now, pay later in 4 easy installments


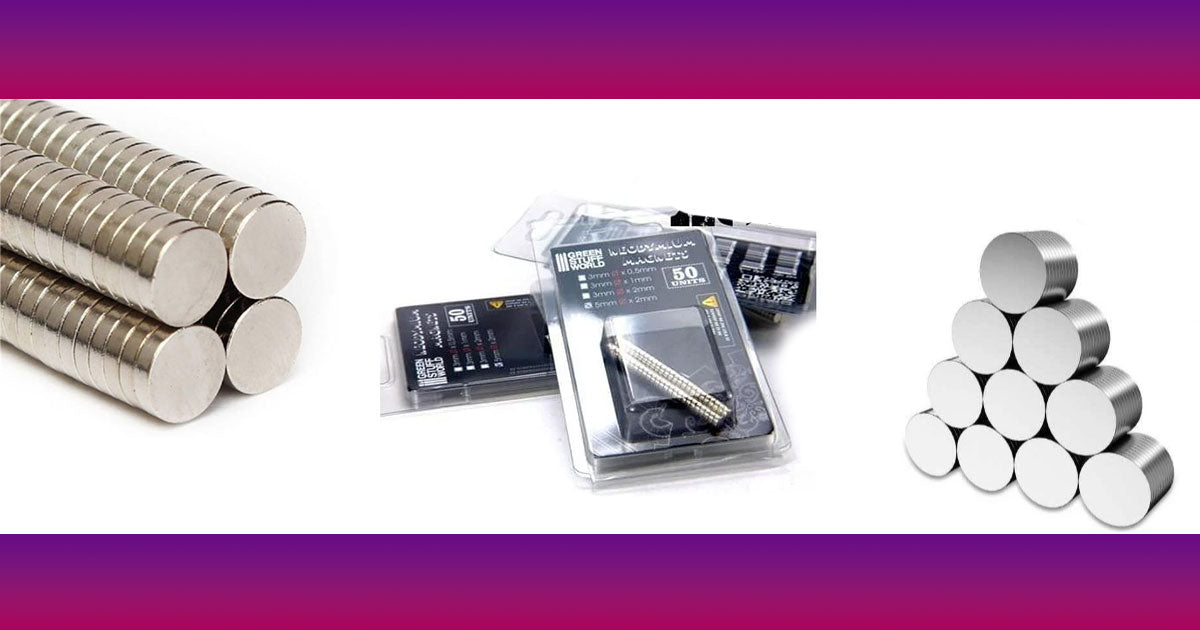
How Magnet Polarity Mistakes Ruin Your Miniatures and What to Do Instead
We've all been there. You spend hours carefully drilling, gluing, and positioning magnets in your prized miniatures, only to discover that half your weapons repel instead of attract. That sinking feeling when you realise you've magnetised an entire squad backwards? Yeah, it's enough to make anyone consider rage-quitting the hobby.
At Hearns Hobbies, we see this disaster unfold more often than you'd think. The worst part isn't just the wasted time – it's watching hobbyists try to fix polarised magnets with superglue-covered fingers while their tournament deadline looms. Some mistakes in miniature gaming are easy fixes. Magnet polarity errors? Not so much. Once that glue sets, you're looking at either major surgery or starting from scratch.
Here's the thing though – magnet polarity problems are completely preventable. Every horror story we hear follows the same pattern: excitement about magnetising leads to rushing the process, which creates a chain reaction of misaligned magnets. By the time you notice, it's usually too late. The good news is that with proper planning and a few simple tools, you can avoid joining the ranks of hobbyists with boxes full of incompatible weapon options.
This guide cuts through the confusion around magnetising miniatures. We'll show you exactly how polarity works, reveal the most common mistakes that ruin projects, and share foolproof systems that experienced converters use. More importantly, we'll help you fix existing polarity problems without destroying your models in the process.
Table of Contents
Understanding Magnet Polarity Basics
Let's start with the fundamentals that'll save your sanity. Every magnet has two poles – north and south. Opposite poles attract, same poles repel. Sounds simple enough, right? The trouble starts because these tiny hobby magnets look identical on both sides. There's no visual indicator telling you which face is which, and that's where everything goes sideways.
The real kicker with miniature magnets is their strength relative to size. Those 2mm x 1mm rare earth magnets pack surprising power – strong enough to snap together through plastic, but also strong enough to forcefully repel when reversed. This creates a double problem: misaligned magnets won't just fail to connect, they'll actively push components apart. Imagine trying to attach a weapon that literally jumps away from the model.
Polarity becomes exponentially more complicated when you're working with multiple connection points. Say you're magnetising a vehicle's weapon sponsons. Each sponson needs magnets that align with the hull, and then the weapons need magnets that align with the sponsons. Get one magnet backwards early in the chain, and every subsequent piece becomes incompatible. It's like a domino effect of magnetic chaos.
What really catches people out is assuming they can eyeball it or remember which way they oriented previous magnets. Human memory isn't reliable enough for this task, especially when you're working on multiple models over several hobby sessions. Even experienced converters who've magnetised dozens of armies still use marking systems because one moment of inattention can cascade into hours of corrective work.
![[SUGGESTED IMAGE: Close-up photo showing marked magnets with clear polarity indicators, demonstrating proper marking technique]](https://www.hearnshobbies.com/cdn/shop/files/neodymium-magnets-3x0-5mm-100-units-n52.jpg?v=1737670017&width=800)
The Five Magnetising Mistakes That Destroy Projects
After watching countless magnetising disasters unfold, we've identified the five mistakes that cause 90% of polarity problems. Understanding these pitfalls helps you recognise danger zones before they wreck your project.
Mistake #1: The "Test Fit Flip"
This one's brutal in its simplicity. You test fit a magnet, it works perfectly, then you remove it for gluing and accidentally flip it over. That split second of inattention just created a permanent problem. The magnet looks identical either way, so you'll only discover the error after the glue sets. We see this constantly with weapon options where hobbyists test multiple configurations before committing.
Mistake #2: The Chain Reaction
Here's where things get properly messy. You successfully magnetise one model, then use it as a reference for the rest of your squad. Seems logical, except if that reference model has even one reversed magnet, you've just multiplied the error across your entire army. By the time you notice, you might have 20+ models all magnetised incorrectly but consistently with each other. Now you're faced with the nightmare choice of fixing everything or accepting that this army's weapons will never be compatible with future additions.
Mistake #3: Mixing Magnet Batches
Not all magnets are created equal, and different suppliers sometimes polarise their magnets differently during manufacturing. You order more magnets mid-project, and suddenly nothing fits together properly. The new magnets work fine with each other but repel everything you've already built. This mistake is particularly insidious because you did everything right – the magnets themselves are the variable that changed.
Mistake #4: The Superglue Panic
Cyanoacrylate sets fast, and magnets love to jump to wherever they want while the glue's still wet. In that panicked moment of trying to reposition a wayward magnet, it's incredibly easy to flip it accidentally. Worse, once you've got superglue on your fingers, every subsequent magnet sticks to you instead of sitting properly in its socket. The combination of time pressure, sticky fingers, and jumping magnets creates perfect conditions for polarity chaos.
Mistake #5: Assuming Visual Alignment
This catches even experienced hobbyists. You carefully drill all your magnet holes, line everything up visually, and assume that magnets placed "face up" in each hole will automatically align correctly. But miniatures have complex geometries – what's "up" on a shoulder joint might be "down" on the weapon that attaches to it. Without testing actual magnetic alignment, you're essentially gambling on getting it right.
Critical Warning
Once a magnet is glued with reversed polarity, removal often damages the model. The force required to pry out a well-seated magnet usually takes chunks of plastic or resin with it. Prevention really is your only reliable strategy here.
Foolproof Prevention Systems
Right, let's talk about systems that actually work. Forget trying to remember which way magnets go – your brain's got better things to do. The pros use physical marking systems that make polarity mistakes nearly impossible.
The Master Magnet Method
This technique has saved countless projects. Take a larger magnet (like a 5mm x 2mm disc) and designate it your "master." Mark one face with permanent marker or paint – this becomes your reference. Every magnet you install gets attracted to this master first, ensuring consistent polarity across your entire project. Keep this master magnet on a metal base or tool handle where it won't get lost or flipped.
The Stack System
Here's a beautifully simple approach: create a stack of magnets all facing the same way. Mark the top of the entire stack with a paint pen. Now, as you peel off each magnet for installation, the marked face always goes in the same direction. When your stack runs low, add new magnets to the bottom, ensuring the marked faces stay aligned. This system works brilliantly for production-line magnetising of multiple models.
The Connection Test Protocol
Never, ever glue a magnet without testing its connection first. Develop this habit: dry fit the magnet, attach the component it needs to connect with, verify attraction is correct, then remove and glue without flipping. Some hobbyists use a tiny dot of blu-tack to temporarily hold magnets during testing, reducing the chance of accidental flips.
The Polarity Map
For complex projects with multiple magnetisation points, sketch a simple diagram showing which face goes where. Sounds excessive? Tell that to someone who's just realised their Knight Titan's weapon arms are all backwards. A quick sketch takes two minutes and prevents hours of heartache. Mark your diagram with N/S or use different colours for different orientations. Keep this reference sheet right next to your workspace.
![[SUGGESTED IMAGE: Workspace setup showing master magnet on stand, marked magnet stack, and simple polarity diagram sketch]](https://www.hearnshobbies.com/cdn/shop/products/neodymium-magnets-3x2mm-50-units_167b326a-4e70-4b62-9b97-444f3f5784f3.jpg?v=1734699655&width=800)
Emergency Fixes for Polarity Problems
So disaster has struck. You've got models with backwards magnets, and your tournament's next weekend. Don't panic – we've got some emergency procedures that might save your bacon. These aren't pretty solutions, but they beat having unusable models.
The Shim Solution
Sometimes you can salvage reversed magnets by adding metal shims between components. Thin steel washers or pieces of metal sheet act as an intermediary that attracts to magnets regardless of polarity. This works best for larger connection points where a 0.5mm gap won't be noticeable. It's not ideal for competitive play where opponents might scrutinise your models, but it gets you gaming again quickly.
The Reverse Mount
If you've magnetised weapons with reversed polarity, consider magnetising their mounting points to match the "wrong" orientation. Yes, this means your weapons won't be compatible with correctly magnetised models, but at least this specific unit becomes functional. Mark these reversed models clearly so you don't mix incompatible weapons later.
The Drill and Fill
For critical pieces where appearance matters, careful extraction might be your only option. Use a pin vise to drill around the magnet's edges, weakening the surrounding material until you can extract it. Fill the resulting crater with putty, let it cure, then re-drill for correct magnet placement. This requires patience and often some rescultping, but it can save irreplaceable models.
The Nuclear Option: Full Conversion
When you've got an entire army magnetised incorrectly but consistently, sometimes it's easier to convert all future additions to match. Create a clearly marked "Army B Standard" master magnet and ensure all new models follow this reversed scheme. Not elegant, but it maintains compatibility within the force. Just never, ever mix these models with correctly magnetised ones from other projects.
Emergency Fix Success Rates
| Method | Success Rate | Damage Risk |
|---|---|---|
| Shim Solution | 85% | Low |
| Reverse Mount | 100% | None |
| Drill and Fill | 60% | High |
| Full Conversion | 100% | None (but limiting) |
Essential Tools and Materials
Having the right gear makes magnetising significantly easier and reduces error rates. You don't need everything on day one, but investing in quality tools pays dividends across multiple projects.
Magnets and Storage
Start with quality neodymium magnets in common sizes: 2x1mm for small weapons, 3x1mm for medium connections, and 5x1mm or 5x2mm for large joints. Buy from reputable suppliers to ensure consistent polarity within batches. Store different sizes in clearly labelled containers – mixing sizes mid-project creates unnecessary complications. Those weekly pill organisers work brilliantly for magnet storage.
Drilling Tools
Precision matters when creating magnet sockets. A good pin vise with sharp bits in your chosen magnet sizes prevents wandering holes. Many hobbyists don't realise that drill bits wear out – dull bits create ragged holes that make magnet alignment harder. Replace bits when they start requiring excessive pressure. A depth stop collar ensures consistent socket depth, preventing magnets from sitting too deep or proud.
Adhesives and Applicators
While superglue works, gel formulas give you precious extra seconds for positioning. Medium-viscosity CA glue provides the best balance of working time and bond strength. Keep accelerator spray handy but use it sparingly – it can make joints brittle. Toothpicks or old brush handles make excellent glue applicators, giving you precise control without getting adhesive on your fingers.
Marking and Testing Tools
A fine-tip permanent marker or paint pen for marking magnet faces is absolutely essential. Choose a colour that contrasts with your magnets – white or silver shows up well on dark rare earth magnets. That master magnet we mentioned? Mount it on a handle made from an old brush or sculpting tool. Some hobbyists create testing stations using metal rulers or steel plates to verify polarity before installation.
Pro Tip
Create a dedicated magnetising toolkit that stays together. Include your master magnet, marking pen, specific drill bits, and reference notes. Having everything in one place reduces setup time and ensures you never start a session missing critical tools.
Advanced Magnetising Techniques
Once you've mastered basic polarity management, these advanced techniques let you tackle complex conversion projects with confidence. These methods come from tournament players and commission painters who magnetise hundreds of models annually.
The Floating Mount System
For models requiring articulation beyond simple swaps, floating mounts offer incredible flexibility. Instead of fixed magnet positions, create recessed channels where magnets can slide slightly. This allows weapons to pivot or adjust angle while maintaining strong connection. Particularly useful for vehicle weapons that need elevation adjustment. The key is making channels just wide enough for magnet movement but narrow enough to prevent rotation.
Multi-Point Magnetisation
Large components benefit from multiple connection points. Rather than relying on one strong magnet, use two or three smaller ones in a pattern. This prevents rotation and distributes load better. When planning multi-point connections, create a template from plasticard to ensure perfect alignment between connecting surfaces. Test fit obsessively – misalignment here means components that look drunk when attached.
The Ball Joint Alternative
Sometimes magnets aren't the answer. For joints requiring extreme articulation, consider hybrid solutions. A magnetised ball sitting in a socket allows full rotation while maintaining easy removal. Create balls from epoxy putty with embedded magnets, or use metal ball bearings with magnetic sockets. This technique excels for display pieces where poseability matters more than gaming durability.
Polarity Isolation Techniques
When adding magnets to an existing army with unknown or mixed polarity, isolation prevents compatibility nightmares. Create distinct connection systems for different unit types – infantry weapons use one polarity standard, vehicle weapons another. Use different magnet sizes as physical keys to prevent mixing incompatible systems. Document these standards religiously; future-you will thank present-you when expanding the army.
![[SUGGESTED IMAGE: Examples of advanced magnetising techniques showing floating mounts, multi-point connections, and ball joint alternatives on actual models]](https://www.hearnshobbies.com/cdn/shop/products/neodymium-magnets-3x0-5mm_440362cd-7166-4e2d-b7d2-a375251c4fdb.jpg?v=1729608683&width=800)
Troubleshooting Guide
Even with careful planning, magnetising projects can hit snags. Here's how to diagnose and solve common problems before they spiral out of control.
Problem: Magnets Falling Out
If magnets pop out during handling, the socket's too shallow or the glue bond failed. Deepen sockets by 0.5mm beyond magnet thickness for proper seating. Clean both magnet and socket with isopropyl alcohol before gluing – finger oils prevent proper adhesion. For persistent problems, rough up smooth socket walls with a drill bit twisted by hand. Some plastics need scoring for glue to bite properly.
Problem: Weak Magnetic Connection
Distance kills magnetic attraction exponentially. If connections feel weak, check socket depth first. Magnets sitting too deep can't generate sufficient pull. The fix might be as simple as adding a thin plasticard shim under the magnet. Also verify you're using appropriately sized magnets – those 2x1mm discs won't hold a metal Dreadnought arm reliably. When in doubt, go one size up.
Problem: Components Rotating
Single-point magnetic connections naturally want to spin. Add texture around the connection point using green stuff to create mechanical resistance. Alternatively, use rectangular magnets instead of round ones – they resist rotation better. For heavy components, pair a central magnet with small guide pins made from paperclip wire. The magnet provides holding force while pins prevent rotation.
Problem: Inconsistent Polarity Mid-Project
Discovering mixed polarity partway through is gut-wrenching. First, stop everything and test all completed pieces. Map which models have which polarity. If it's early enough, bite the bullet and fix the minority standard. If you're too far along, implement the isolation protocols mentioned earlier. Create clear documentation about which models follow which standard, and physically separate incompatible groups during storage.
Quick Diagnosis
- • Test with known-good piece
- • Check magnet orientation
- • Verify socket depth
- • Inspect glue coverage
- • Measure gap distance
Prevention Checklist
- • Mark master magnet
- • Test before gluing
- • Document standards
- • Consistent supplies
- • Patient installation
Planning Your Magnetising Project
The difference between smooth magnetising and disaster often comes down to planning. Five minutes of prep work prevents hours of fixes later. Here's how to approach any magnetising project systematically.
Step 1: Inventory and Design
List every connection point needing magnets. For a typical infantry squad, this might include weapon options, special wargear, and decorative bits. Sketch rough diagrams showing where magnets go. Decide on magnet sizes for each connection type – consistency within categories simplifies installation. Count total magnets needed and add 20% for mistakes and testing.
Step 2: Compatibility Planning
Consider future expansion. Will these models need to share weapons with units you'll add later? Planning universal standards now prevents incompatibility headaches. If you play multiple game systems, consider whether weapon options might cross over. Some hobbyists maintain different standards for different games, using magnet size as a physical incompatibility barrier.
Step 3: Order of Operations
Install magnets in logical sequence. Start with the largest, most critical connections – usually torso-to-legs or hull-to-turret joints. These set your polarity standard for the entire project. Work outward to smaller connections, testing compatibility at each stage. Leave cosmetic magnetisation like optional accessories for last, when all functional connections are proven.
Step 4: Workspace Setup
Organise your workspace for efficiency and error prevention. Place your master magnet prominently where it won't get knocked over. Arrange tools in order of use. Keep a damp cloth handy for quick finger cleaning – superglue and magnets are a messy combination. Work on one model at a time to completion rather than assembly-line style; this reduces confusion and mixed standards.
Actually, here's something most guides won't tell you: schedule magnetising sessions when you're fresh. This isn't mindless assembly work – it requires constant attention to detail. Trying to magnetise after a long day at work is asking for polarity problems. Save it for weekend mornings when your focus is sharp.
Project Planning Template
Project: _______________ Date: _______________
Total Models: _____ Connection Points per Model: _____
Magnet Sizes Needed: _________________________
Master Magnet Marked: ☐ Test Model Complete: ☐
Polarity Standard: ☐ New ☐ Matching: ___________
Frequently Asked Questions
Can I fix magnets that are spinning loosely in their sockets?
Absolutely, though the fix depends on why they're spinning. If the socket's too large, carefully add thin rings of superglue around the magnet edge, building up material until it fits snugly. For magnets that seated properly but broke free, clean out all old adhesive first. A tiny amount of green stuff in the socket before reinserting the magnet creates both adhesion and fills gaps. Just ensure the magnet sits flush with the surface.
What's the strongest magnet size I should use for 28mm miniatures?
For most infantry-scale models, 3x1mm or 5x1mm magnets provide optimal strength without being overkill. Anything stronger risks damaging the model when separating parts. Larger vehicles and monsters can handle 5x2mm or even 6x2mm magnets. Remember, it's not just about holding strength – oversized magnets can interfere with nearby metal components or affect how models pack for transport. When in doubt, test on a spare bit first.
How do I transport magnetised models safely?
Magnetic fields can cause havoc in foam cases, with weapons detaching and flying to random models. Use metal-lined cases or cookie sheets in plastic containers. This turns the magnetism into an advantage – models stick securely to the surface. For mixed collections, wrap magnetised weapons separately in tissue paper or store them in small compartments away from the main models. Some players use pill organisers exclusively for magnetised bits during transport.
Is there a way to test magnet polarity without a master magnet?
In a pinch, use any speaker – they contain strong magnets with consistent polarity. Hold your magnet near the speaker cone (not too close on expensive speakers!). The attraction/repulsion tells you the polarity. Alternatively, float a magnetised needle on water – it'll orient north-south like a compass. Mark this known orientation and use it as your reference. But honestly, just make a proper master magnet – these emergency methods introduce unnecessary error potential.
Final Thoughts
Magnet polarity mistakes might seem like a minor issue until you're staring at incompatible models worth hundreds of dollars. We've covered prevention systems, emergency fixes, and advanced techniques, but the core message remains simple: respect the process, mark everything, and test before committing.
The horror stories you hear about magnetising disasters? They're all preventable. Every single one comes down to rushing, poor planning, or ignoring basic polarity principles. The systems we've outlined aren't theoretical – they're proven methods used by hobbyists who magnetise dozens of models monthly without issues. Pick the approach that suits your style and stick to it consistently.
Look, we get it – magnetising adds time to projects when you'd rather be painting or gaming. But that investment pays off the first time you can swap weapons for different game modes, or pack models efficiently for transport. More importantly, it prevents the soul-crushing experience of irreversible polarity mistakes. Your future self will thank you for taking the extra care now.
Remember, every expert magnetiser started where you are, probably with a few backwards magnets of their own. The difference is learning from those mistakes and implementing systems to prevent them. Whether you're tackling your first tactical squad or planning a fully modular vehicle pool, proper polarity management makes the difference between success and expensive regret.