
Gluing your tires is one of the basic things to know when starting out with RC cars. For your tires to perform at their best both on and off the road, you have to know how to properly prep them for the track. In this blog, we'll be talking about how to glue on tires and share some handy tips and tricks that might be useful for you when it's your turn to prep for the tracks. Let's get right into it!
Summary
- What are the Different RC Tire Variations?
- How to Glue Your Tires (Step-by-Step Instructions)
- Watch and Learn from Following our Video
What are the Different RC Tire Variations?
There are various types of RC tires out there, each with their own unique characteristics to suit the different RC models they are going to be fitted into. Here are some of the different RC tire variations:
- On Road Tires at 1/10th scale
- Off Road Tires at 1/10th scale
- On Road Tires at 1/8th scale
- Off Road Tires at 1/8th scale
- Crawler Tires
- Drift Tires
A Step-by-Step Guide on How to Glue Your Tires
There are a number of different ways of gluing on tires. We will be sharing this guide for newer modelers to help them get started, as well as for experienced modelers that are looking into new ways to glue on their tires.
Using high-quality tools is key to perfecting it, so we’ll also be giving you recommendations on what materials would be good to use.
Materials you will need:
- Tires
- Wheels
- Hole punch
- Tire Bands/Thick Rubber bands
- Super Glue
- Rag/Cloth
- Alcohol
Recommendations:
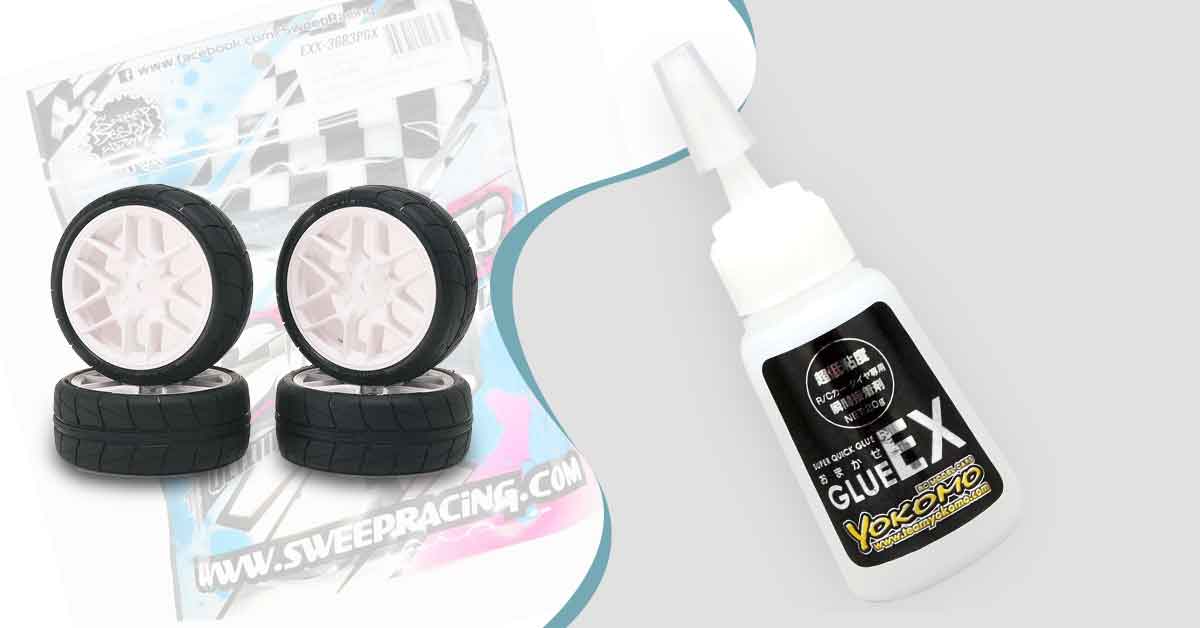
Tires: YOKOMO and SWEEP are both excellent choices if you’re looking into high-performing tires that can last for ages.
Wheels: If you want a trusty companion to go with your tires on the track, YOKOMO wheels are the way to go.
Check out our collection of tires & wheels here
Tire Bands: You can use thick rubber bands that come in a pack of hundreds. They are nice, cheap, and relatively easy to get.
Super Glue: YOKOMO Super Glue is a must-have when tire gluing. It is a thin glue that comes with attachable ultra-fine nozzles that make the application process easier.
Check out our collection of adhesives here
Alcohol: Isopropyl alcohol and brake cleaner can be used to remove any release agent from the tire and make sure that the surface will allow the glue to stick.
How to Glue Your Tires
Step One: Punch some holes in
The first step is to punch some holes in the tire. Make sure that your hole punch is sharp so you will not struggle with this step. Puncture a hole no larger than 4 millimeters in diameter in the inner sidewall of the tire. This can be a little tricky, but it should not pose too much of a problem. Then, make a second hole parallel to the first one you made so that each tire half has a hole. The holes should make a straight line cutting through the tire halfway if you draw an imaginary line over it.
Step Two: Clean your tires
Now use some alcohol and a fresh rag to give your tires a good clean. Some people use brake cleaner, but you can use a range of different things. Simply give it a quick wipe to ensure that nothing is on the bead and clean it properly so the superglue can stick to the tires without any issues. Make sure to wipe the wheel's bead as well to remove any residue from manufacturing.
Step Three: Attach the tires
Make sure the tire is securely fastened to the wheel and that it sits nicely on the bead. This can take a little bit of work, but it is something that you should not rush too much. If the tire is set poorly, it will be challenging to glue the tire on properly and can result in it being out of balance, which can greatly reduce the tire's performance.
Step Four: Bond the tire
Bond the tire using tire bands or thick rubber bands. By adding the bands, the tire compound will stiffen and make it easier to glue the tires onto the bead. Without the binding, it would be challenging to make sure that the glue is going in the right place because the tire compound is so soft.
Step Five: Glue your tires
Here comes the tricky part: gluing. When using super glue, sometimes less is more. You should only use a small amount around the wheel, rolling the bead back slightly as you go to ensure that there is enough surface area for the glue to actually set. You do not want a puddle in any one spot. If the glue begins to pool and puddle around the bead, pull it back a little while it works its way in. Put a little extra glue on the bead, but not too much; just enough to ensure that you have a nice, even bead of glue all the way around the tire.
Tip: Choose a glue that has a fine nozzle applicator and a thin consistency. This will make it easier for you to apply the glue to any surface you want.
Step Six: Let it sit
Let the tire sit for a good 10-15 minutes, or until it completely dries off. And after the glue fully sets, give it a good wipe with the alcohol-soaked rag. Make sure the glue has had time to fully set before tinkering with it.
Tip: Acetone, some nail polish removers, or anything generally acetone-based, will work nicely for any clean-up involving super glue.
Step Seven: Do the outside bead
Put the tire bands back on after cleaning any residue off the tires, then begin working on the outside bead. Make the outside bead a little bit neater by pulling the tires back and applying glue to areas that need it. Pull the band off and work the glue in after making sure you have a good, even bead all the way around the tire. Let it set for 10 to 15 minutes again before fitting it on your RC. Ideally, you should glue your tires several days before putting them to use, or at the very least the night before.
Step Eight: Check your tires
Before installing the tires on your car, give them one more check to make sure everything is in place.
Watch and learn!
Still a bit confused? Watch BJ as he walks you through the process of gluing your RC's tires.
There you have it! Knowing how to apply tire glue properly will ensure that your RC runs at its peak performance on every course.
What do you want us to make a tutorial on next? Feel free to message us with your ideas!
Also, make sure to follow us on Facebook, Instagram, Twitter, and Twitch!