
Ever wonder what your airbrush kit is missing? Accessories might be it. In this blog, we will be talking about different additions that your kit might just need. Let’s get right into it!
Summary
- What are Airbrush Accessories?
- 4 Airbrush Accessories Guaranteed to Make Your Life Easier
- Watch and learn from our Video
What are Airbrush Accessories?
Airbrush accessories are add-ons that perform a specific function; they can be attached to the airbrush and come in a variety of forms and styles, serving as gadgets that perform specialized roles for the airbrush. They are optional components that most people choose to get to improve their airbrushing experience. These add-ons help with spray application, storage, and cleaning.
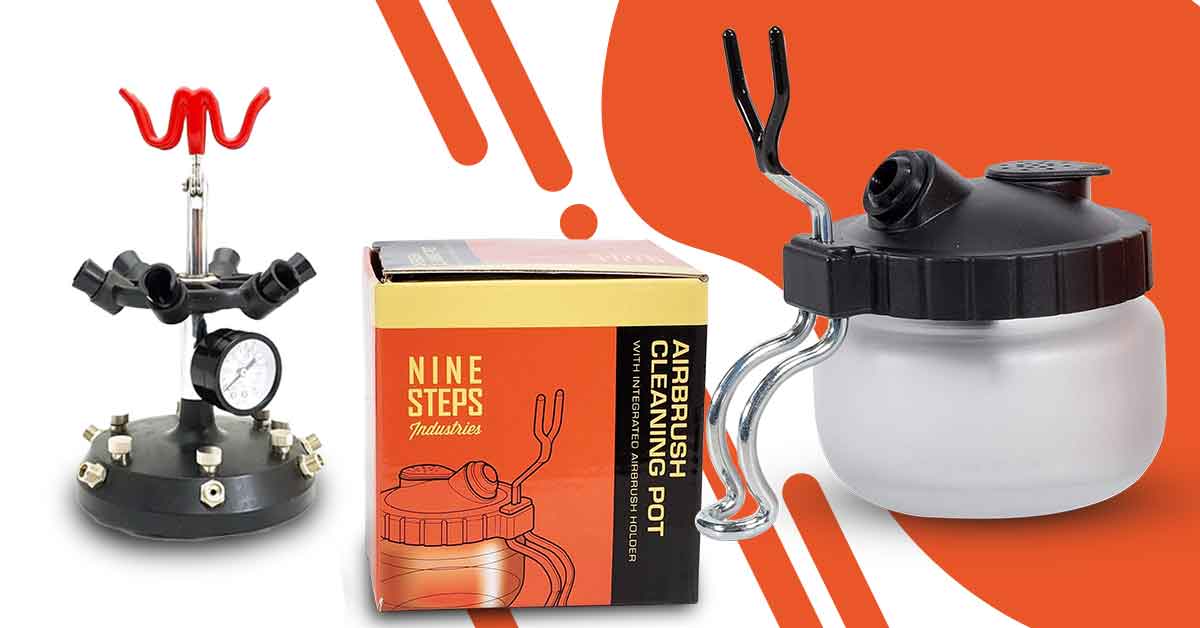
4 Airbrush Accessories Guaranteed to Make Your Life Easier
There are various types of airbrush accessories out there, each with their own specific purpose. In this blog, we will be featuring four airbrush accessories that will, no doubt, make your life easier—in the airbrush department at least.
The NINESTEPS Airbrush Hub and Holder is a handy accessory to have, especially if you’re dealing with several kinds of airbrushes at once. It’s a distributor hub that can hold up to eight airbrushes at once. The three common types of airbrushes, namely the general-purpose type with a 0.3 millimeter nozzle; the fine type with a 0.2 or 0.1 millimeter nozzle; and the large-area type, can all be connected to the hub simultaneously.
Operating this accessory is simple. Here are the instructions to get yours up and running:
How to Use NINESTEPS Airbrush Hub and Holder
Step One:
Plug the hose connected to the compressor into the device. It has multiple outputs that can accommodate up to eight different airbrushes. The airbrush can be plugged into the outputs and lined up with the airbrush holder.
Step Two:
Once the hose is connected, switch the hub on. Each hub has an individual valve that can be switched on and off. Once the valve that the hose is hooked up to is opened, the airbrush can now be used.
With this contraption, you can hide your air compressor and just use this hub out in the open because it already features a gauge where you can see the pressure levels. It’s very heavy but also very stable. You can connect as many hoses as the output permits simultaneously with the multiple hoses hooked up on the hub placed on the hooks. Besides the hooks, it also has quick access holders that are incredibly useful, especially when filling up your nozzle with paint, so it will not be easily knocked over.
The SIGNATURE Air Brush Holder is a simple airbrush holder that can hold up to four airbrushes at once. This standard holder is also very stable, with four hooks you can put the airbrush on. It has two flexible nozzle holders that can be bent at different angles.
The NINESTEPS Airbrush Cleaning Pot with Holder is a great airbrush accessory that greatly helps when it comes to airbrush maintenance. Cleaning an airbrush can sometimes be a pain. The vapor goes all over the place—on your hair, face, or all over your furnishings. With an airbrush cleaning pot, you can prevent the agonizing clean-up you would otherwise have to deal with afterwards if you were not using one.
How to Use an Airbrush Cleaning Pot
Step One:
Push the airbrush nozzle inside the hard rubber end in the top section of the pot, make sure it is resting snugly there, and then begin releasing the paint. The hard rubber end provides a tight seal to ensure that none of the vapor being released escapes while making sure that the nozzle is not damaged or scratched.
Step Two:
The airbrush will spray directly into the cleaning pot. Basically, what is happening is that when the spray hits the baffle wall inside the pot, it transforms the paint that is being sprayed back into droplets, and those droplets will drip into the bottom of the pot. The cleaning pot has multiple filters in place, so as you’re releasing the paint, there is no vapor coming through as the filters trap most of the vapor.
Step Three:
Empty all of the paint inside the cleaning pot, and if it still needs more cleaning, add more lacquer or water and flush it again inside the pot. Repeat the process as many times as necessary. The cleaning pot will collect all the paint and filter all the vapor.
Step Four:
All that is left to do after cleaning is to pour the paint out and wash the pot in water or thinner, depending on the kind of paint you used.
Tip: Put some tissues inside the pot; this will work as an additional filter that will absorb the vapor as it enters and act as an additional filter, so there's less chance of the vapor escaping. All you have to do to clean the pot after using it is to open it, take out the tissue, and wipe the inside with it. You'll see that simply by wiping, the pot will already be clean. One of the issues you can run into is that if water is unintentionally left inside for a long period of time, it could spoil and start to mold. However, if there is tissue paper inside, you can quickly remove it and toss it away.
IWATA Airbrush Quick Connect makes it possible to remove your airbrush from the hose's end without any leaks. All you have to do is connect the two ends—the male end is connected to the airbrush, and the female end to the hose. In order to prevent tank depletion, especially in tank compressors, this does a great job by functioning as a seal.
Watch and learn!
Watch BJ as he showcases different airbrush accessories guaranteed to make your life easier.
There you have it! Have an awesome airbrush experience by getting yourself simple airbrush accessories to fulfill your airbrushing needs.
Have any tips up your sleeve? Feel free to drop them in the comments section below!
Also, make sure to follow us on Facebook, Instagram, Twitter, and Twitch!