
Breaking In New RC Motors Without Breaking Them
We've all been there - fresh motor in hand, itching to bolt it straight into our favourite RC and hammer the throttle. But here's the thing: those first few runs determine whether your motor delivers months of reliable power or becomes an expensive paperweight after a few battery packs.
At Hearns Hobbies, we see it constantly - motors cooked within days because enthusiasts skipped the break-in process. The temptation to go full send immediately is real, especially when you've just dropped serious cash on a high-performance brushless motor. But taking thirty minutes for proper break-in can literally double your motor's lifespan. That's not marketing fluff - it's physics.
Modern RC motors pack incredible power density into tiny packages. Whether you're running a screaming 4-pole brushless in your speed runner or a torquey brushed crawler motor, the internal components need time to mate properly. Think of it like breaking in a real car engine - except the consequences of stuffing it up happen in minutes, not thousands of kilometres.
The good news? Breaking in motors properly isn't complicated or time-consuming. Once you understand why it matters and how different motor types respond, you'll nail it every time. We'll walk through the exact procedures that work, the mistakes that'll cost you, and some tricks we've learned over decades of building and racing in the Australian RC scene.
Table of Contents
Why Motor Break-In Actually Matters
Let's get technical for a minute - understanding what happens inside your motor during break-in helps explain why rushing this process costs you performance and longevity. Every motor contains precision components that need to wear together gradually. Microscopic high spots on bearings, slight imperfections in windings, and manufacturing residues all need addressing before you demand maximum performance.
In brushed motors, the carbon brushes must conform perfectly to the commutator's curve. Fresh brushes have flat faces that create minimal contact area initially. During break-in, these surfaces gradually wear to match the commutator's radius, maximising conductivity and minimising resistance. Skip this process, and you get arcing, excessive heat, and premature brush wear that'll have you shopping for replacement parts way too soon.
Brushless motors might seem simpler - no brushes to seat, right? But they've got their own break-in requirements. The bearings need to distribute their internal lubricants evenly, and any manufacturing oils or debris must work their way out. More critically, the magnets can actually lose strength if overheated during those first runs. A gentle break-in ensures everything settles into optimal operating conditions without thermal stress.
Temperature plays a massive role here, especially in Australian conditions. Running a fresh motor hard on a 35-degree arvo is basically asking for trouble. The internal components expand at different rates, tolerances change, and lubrication thins out. Combine that with the heat generated from high current draw, and you've got a recipe for premature failure. Proper break-in establishes baseline operating temperatures that keep everything happy long-term.
![[SUGGESTED IMAGE: Close-up comparison of new vs properly broken-in motor brushes showing wear patterns]](https://www.hearnshobbies.com/cdn/shop/files/HW30404310.jpg?v=1736878530&width=600)
Breaking In Brushed Motors
Brushed motors remain popular in entry-level vehicles and crawlers for good reason - they're simple, torquey, and relatively forgiving. But they absolutely need proper break-in to reach their potential. The process isn't difficult, just requires patience and the right approach.
Start by running your brushed motor at low voltage - about 3-4 volts works perfectly. You can use a variable power supply if you've got one, or even a couple of AA batteries in series. The goal is spinning the motor slowly enough that the brushes gradually wear into the commutator without generating excessive heat. Run it for 5-minute intervals with cooling breaks between. You'll actually hear the motor smooth out as the brushes seat properly.
After about 20 minutes of low-voltage running, it's time to check your progress. Pop the motor open (if it's rebuildable) and inspect the brushes. They should show even wear patterns without any chunking or excessive carbon buildup. A bit of carbon dust is normal - that's just the brushes wearing in. Clean the commutator gently with a cotton bud and some motor spray from your maintenance kit.
Now comes the load testing phase. Install the motor in your vehicle but keep the wheels off the ground initially. Run through your battery at about 50% throttle, monitoring motor temperature constantly. If it's getting too hot to touch comfortably (over 60°C), you're pushing too hard. After this no-load run, you can finally hit the track - but still keep it under 75% throttle for the first few packs. Yeah, it's tempting to pin it, but trust the process.
Quick Tip
For sealed brushed motors that can't be opened, extend the break-in period to compensate. Run 30 minutes at low voltage instead of 20, and be extra conservative with initial throttle application. The brushes still need to seat properly - you just can't visually confirm it.
Brushless Motor Break-In Process
The internet's full of arguments about whether brushless motors need break-in. Here's the truth from years of experience: while they don't require the extensive process of brushed motors, a proper break-in definitely improves performance and longevity. The bearings need to settle, manufacturing lubricants need to distribute, and the windings benefit from gradual thermal cycling.
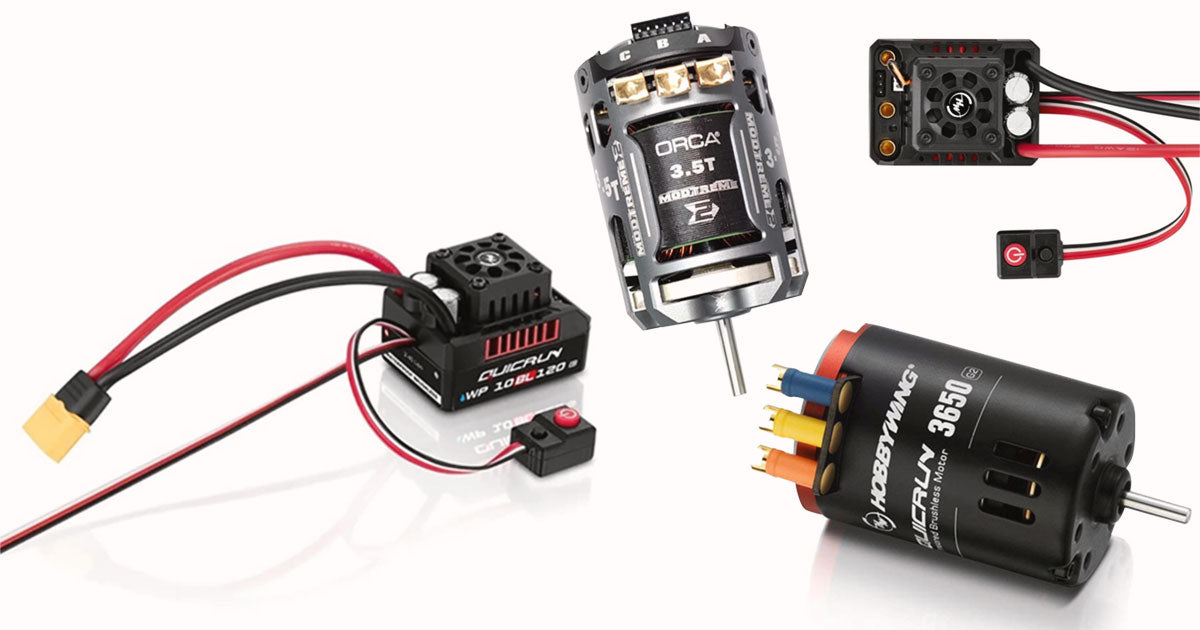
Start your brushless motor break-in with a simple bench test. Connect it to your ESC and run it at about 25% throttle for 2-3 minutes without any load. Listen for any unusual sounds - grinding, clicking, or excessive whining could indicate problems that'll only get worse under load. A properly functioning brushless should sound smooth, with just a normal electrical hum.
Next, install the motor in your vehicle but keep it unloaded (wheels off the ground). Run through a full battery pack at varying throttle positions - don't just hold it steady. Vary between 25% and 75% throttle, occasionally blipping to full throttle for a second or two. This process helps the bearings seat properly while cycling the temperature up and down gradually. Monitor the motor temperature throughout - it should stay below 50°C during this no-load running.
For the first loaded run, choose a larger pinion than you'd normally race with. This reduces the load on teh motor while still providing some resistance. Keep your first few packs conservative - no full throttle speed runs or aggressive acceleration. Focus on smooth driving and monitor temperatures religiously. After 3-4 packs at reduced load, your motor's ready for normal gearing and full performance. The whole process takes maybe an hour of actual runtime, but those motors will thank you with consistent performance over hundreds of packs.
![[SUGGESTED IMAGE: Brushless motor connected to ESC on workbench showing proper break-in setup]](https://www.hearnshobbies.com/cdn/shop/files/HW38030208.jpg?v=1746661603&width=800)
The Water Break-In Method
Now here's something that sounds completely mental at first - dunking your brand new motor in water to break it in. But for brushed motors, it's actually one of the most effective methods out there. The water acts as both a coolant and a mild load, allowing extended run times without overheating. Just remember - this ONLY works for brushed motors. Don't even think about trying this with brushless unless you fancy buying a replacement.
Fill a container with distilled water (not tap water - the minerals cause problems). The water should completely cover the motor can but not reach the electrical connections. Connect your motor to a power source set at about 3-4 volts and let it run submerged for 10-15 minutes. The water keeps everything cool while providing gentle resistance that helps the brushes seat perfectly. You'll see carbon particles floating in the water - that's completely normal.
After the water run, immediately disassemble the motor (if possible) and dry everything thoroughly. Compressed air works great for blowing water out of tight spaces. Apply a drop of light bearing oil to each bushing or bearing, and give the commutator a gentle clean with motor spray. Some racers follow up with a few drops of comm drops - special treatments that improve conductivity between brushes adn commutator.
The results from water break-in can be pretty impressive. Motors run smoother, deliver more consistent power, and the brushes last significantly longer. It's particularly effective for high-turn crawler motors where smooth low-speed control matters more than outright speed. Just make sure everything's bone dry before reassembly - any moisture left inside will cause corrosion that'll ruin your motor faster than running it without break-in.
Water Break-In Safety Checklist
| Step | Critical Points |
|---|---|
| Water Type | Distilled only - never tap water |
| Voltage | 3-4V maximum |
| Duration | 10-15 minutes max |
| Post-Run | Complete drying essential |
| Motor Type | Brushed motors ONLY |
Break-In Mistakes That Kill Motors
We see the same motor-killing mistakes over and over at the shop. The biggest one? Impatience. Blokes drop serious money on a high-performance combo, and they want to experience that power immediately. But going full throttle on a fresh motor is like redlining a cold engine - you're asking for expensive problems.
Over-gearing during break-in ranks as the second most common mistake. Your motor might handle a massive pinion once it's properly run in, but those first few runs need conservative gearing. The extra load generates heat that warps brush springs, degrades magnets, and cooks bearings before they've had a chance to seat. Drop down 2-3 teeth from your target gearing for break-in, then work your way up gradually.
Ignoring temperature is another motor killer, especially during Australian summers. Motors generate significant heat during break-in as components wear together. Add 38-degree ambient temps, and you're pushing thermal limits before even hitting the track. Invest in a decent temperature gun and check constantly during break-in. If you can't hold your finger on the motor can comfortably, it's too hot.
Running dirty power through new motors causes problems people don't expect. Old batteries with high internal resistance cause voltage spikes and drops that stress motor components. Use a good quality battery for break-in - preferably one that's not on its last legs. Same goes for your ESC settings - keep timing conservative and punch control moderate during those first runs. You can dial in aggressive settings once everything's properly bedded in.
Warning Signs During Break-In
Stop immediately if you notice: excessive sparking from brushed motors, unusual grinding or scraping sounds, motor getting too hot to touch (over 60°C), significant vibration, or any burning smell. These indicate serious issues that need addressing before permanent damage occurs.
Post Break-In Maintenance
Once your motor's properly broken in, maintaining its performance becomes pretty straightforward. Regular maintenance extends motor life dramatically - we're talking the difference between replacing motors every few months versus running the same motor for years. The key is consistency and catching problems before they become failures.
For brushed motors, check and clean the commutator every 10-15 runs. A quick spray with motor cleaner and a gentle scrub with a comm stick keeps conductivity optimal. Watch for uneven brush wear - if one brush is wearing faster, you might have alignment issues or a bent shaft. Replacement brushes are cheap, so don't run them down to nothing. Change them when they're about 50% worn for best performance.
Brushless motors need less frequent attention but still benefit from regular care. Check bearing smoothness by spinning the motor by hand - any notchiness or grinding means it's time for new bearings. Keep the motor can clean, especially the cooling vents. Compressed air blasts out debris that blocks airflow and causes overheating. Some racers add a drop of light oil to the bearings every 20-30 runs, though modern sealed bearings technically shouldn't need it.
Gear mesh deserves special attention after break-in. As motors wear in, they might develop slight play in the bearings that affects mesh. Too tight and you'll overheat everything; too loose and you'll strip gears. Check mesh regularly and adjust as needed. A properly meshed drivetrain should have just a tiny bit of play - you can feel it but barely see it. Paper test works great: fold a piece of paper and run it through the gears to set spacing.
![[SUGGESTED IMAGE: Motor maintenance tools laid out including comm stick, motor spray, bearing oil, and cleaning brushes]](https://www.hearnshobbies.com/cdn/shop/files/00129306-orca-mo24mtm2450-002-1000x1000.jpg?v=1722419391&width=1000)
Matching Motors to Applications
Choosing the right motor for your application makes break-in and maintenance heaps easier. We see plenty of enthusiasts running motors completely wrong for their needs - like using a high-KV speed motor in a crawler or a torquey crawler motor in a speed build. Wrong motor choice leads to overheating, poor performance, and premature failure regardless of break-in quality.
For bashing and general off-road, you want durability over outright performance. Look for motors in the 3000-4000KV range for 2S applications, or 2000-2400KV for 3S setups. These provide good power without running at their limits constantly. Sensored motors offer smoother starts and better low-speed control, though sensorless units handle abuse better. Break-in for bashers should focus on durability - take extra time to ensure everything's properly seated.
Racing demands different priorities. On-road racers typically run modified motors with specific turn ratings matched to track layouts and class rules. These motors need meticulous break-in because you're chasing every fraction of a second. Water break-in works brilliantly for stock motors, while modified motors benefit from careful voltage stepping during break-in. Temperature management becomes critical - these motors run right at their thermal limits.
Crawling and scaling require maximum torque at low speeds. High-turn brushed motors (27T-55T) or low-KV brushless (1200-1800KV) deliver the grunt needed for technical terrain. These motors actually benefit from extended break-in periods because smooth power delivery matters more than peak output. Crawler builds often use sensored brushless for precise throttle control, and proper break-in ensures that sensor alignment stays perfect.
Speed/Racing
- • Modified or 13.5T/17.5T
- • High KV (3500+)
- • Precision break-in critical
- • Temperature monitoring essential
Bashing/Trail
- • 3000-4000KV (2S)
- • 2000-2400KV (3S)
- • Standard break-in fine
- • Durability over peak power
Crawling/Scale
- • 27T-55T brushed
- • 1200-1800KV brushless
- • Extended break-in beneficial
- • Smooth delivery priority
Troubleshooting Motor Issues
Even with perfect break-in, motors can develop issues. Catching problems early usually means a simple fix rather than a replacement. Understanding what different symptoms mean helps diagnose problems before they cascade into expensive failures. Here's what to watch for and how to address common motor dramas.
Cogging or stuttering at low speeds typically indicates sensor problems in brushless motors or worn brushes in brushed units. For sensored brushless, check the sensor wire connection first - they're surprisingly fragile. Sometimes simply reseating the connector fixes everything. If that doesn't work, the sensor board might need replacement. In brushed motors, stuttering usually means the brushes are worn unevenly or the comm needs serious cleaning.
Excessive heat generation points to several possible issues. Over-gearing is the obvious one, but check your ESC settings too. Too much timing advance cooks motors quickly. Worn bearings create extra friction and heat, while damaged windings cause hot spots. If your motor's running hotter than usual with no obvious cause, check for debris wrapped around the shaft or stuck in cooling vents. Amazing how much heat a tiny piece of grass can generate.
Loss of power creeps up gradually, making it hard to notice until performance really suffers. In brushed motors, worn brushes are usually the culprit - easy fix with replacement brushes. Brushless motors losing punch might have demagnetised rotors from overheating, or worn bearings causing extra drag. Sometimes it's actually the battery that's tired, not the motor - always test with a known good pack before condemning a motor.
Strange noises tell you exactly what's wrong if you know how to listen. Grinding means bearing failure - stop immediately before it damages the motor can. High-pitched whining in brushless motors often indicates timing issues or sensor problems. Clicking or knocking sounds suggest something's loose inside, maybe a magnet coming unglued. Any unusual noise warrants investigation because motors rarely fix themselves.
Quick Diagnostic Check
Run your motor at low throttle unloaded and listen carefully. Smooth humming is good. Any grinding, clicking, or irregular sounds need investigation. Check temperature after 30 seconds - barely warm is normal. Spin by hand feeling for notchy bearings or dragging. These simple checks catch 90% of problems early.
Alright, let's talk about when a motor's actually cactus versus just needing some TLC. Brushed motors are pretty forgiving - as long as the comm isn't completely destroyed and the windings aren't burnt, they can usually be rebuilt. New brushes, bearings, and a good clean brings most back to life. The rebuild parts cost bugger all compared to a new motor.
Brushless motors are trickier to repair. Bearing replacement is straightforward if you've got the right tools, but damaged windings or demagnetised rotors mean replacement time. Some high-end motors offer replacement rotors and stators, though by the time you factor in labour, a new motor might make more sense. Sensor boards can sometimes be replaced, but it's delicate work that's easy to stuff up.
Frequently Asked Questions
Do I really need to break in a brushless motor if the manufacturer says it's not required?
While modern brushless motors technically work straight out of the box, proper break-in absolutely improves longevity and performance. Those bearings need to distribute their lubricants evenly, and gradual thermal cycling helps everything settle properly. Sure, you can skip it, but spending 30 minutes on break-in could add months to your motor's life. We've tested identical motors with and without break-in - the difference in smoothness and consistency after 50 packs is noticeable.
Can I use WD-40 or other general lubricants on my RC motor?
Absolutely not - WD-40 and similar products will destroy your motor. These penetrating oils break down the proper lubricants in bearings and leave residue that attracts dirt. Use only proper motor sprays and bearing oils designed for RC applications. Purpose-made motor maintenance products might cost more, but they're formulated specifically for high-speed electric motors. WD-40 is great for many things, but RC motors ain't one of them.
How do I know when my motor needs rebuilding versus replacing?
For brushed motors, if the commutator still has decent copper showing and isn't severely grooved, rebuilding makes sense. New brushes and bearings cost under $20 and bring most motors back to life. Brushless motors are different - bearing replacement is worthwhile, but burnt windings or damaged magnets mean replacement time. Generally, if repair costs exceed 50% of a new motor's price, go new. Also consider the motor's age and how hard it's been run - sometimes a fresh start with updated technology makes more sense.
Why does my motor run fine for the first few minutes then lose power?
That's classic thermal throttling or heat-related resistance increase. As components heat up, resistance increases and performance drops. Common causes include over-gearing, excessive timing advance, worn bearings creating friction, or insufficient cooling. Check your gearing first - drop a few teeth on the pinion and see if it helps. Ensure cooling air can flow freely around the motor. If problems persist, worn bearings or tired brushes might be creating extra resistance. Fresh bearings often solve these thermal issues.
What's the difference between sensored and sensorless break-in procedures?
Sensored motors need a bit more care during break-in because you're also ensuring the sensor board and timing stay properly aligned. Keep RPMs lower initially and avoid aggressive acceleration that might affect sensor calibration. Sensorless motors are more forgiving - they don't have the delicate sensor components to worry about. Both benefit from gradual thermal cycling and bearing seating, but sensored motors should be treated more gently during those first runs. If your ESC supports it, run sensored motors in sensored mode during break-in for smoothest operation.
Final Thoughts
Breaking in RC motors properly isn't rocket science, but it makes a massive difference to performance and longevity. We've covered everything from basic procedures to advanced techniques, but the core message is simple: take your time during those first runs, and your motors will reward you with consistent performance for ages.
The procedures we've outlined come from decades of collective experience in the Australian RC scene. Whether you're setting up a first basher or prepping a national-level race motor, these techniques work. The difference between a properly broken-in motor and one that's been thrashed from new is like night and day - smoother power delivery, better efficiency, and significantly longer life.
The RC hobby's all about pushing limits and having fun, but a bit of patience during motor break-in pays massive dividends. Your future self will thank you when those motors are still pulling hard after dozens of race days or hundreds of bash sessions. Now get out there and give those new motors the proper break-in they deserve!