
BJ gives some handy tips and tricks that you can apply on your next project!
Or even as a pilot hole tool using the very tip to drill a hole just big enough for your proper drill bit to catch and drill through!

2.) With so many of us dusting off kits from the stash and putting the old Revell Contacta bottle to use, this tip will save a lot of frustration when you find the glue not flowing down the needle.
Well BJ has a neat little trick with just a simple lighter and the needle tip of the glue dispenser, heating the old glue inside to vaporize and clear out! But be careful as the needle will get scorching hot, so best to use some pliers (applying gentle pressure just to hold the metal piece but not damage/squash it).
Then with a lighter run the flame over the needle making sure to hold the needle at a slight angle so the vaporised glue fumes can escape out the top, repeating a few more times until there is no more little "pops" of the glue gas escaping, then placing the needle somewhere safe to let it cool (don't use water or any liquid to cool it) and then you can reconnect it and test to see if it fixes it!
If not you can repeat the process again, or if that still doesn't fix it, then maybe its time to get a new Revell Contacta Glue

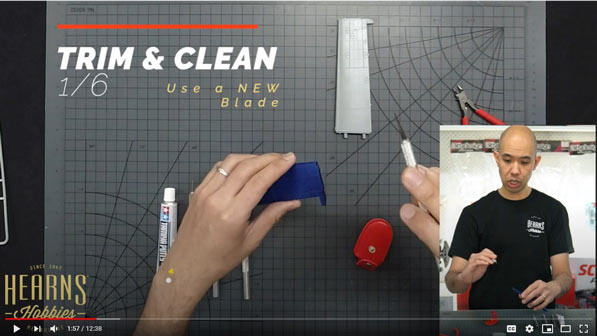
3.) The three simple processes of cutting and cleaning up a part for a plastic model kit.
1. Use side cutters/nippers to cut off the injection gates and the part off the sprue.
2. Use a sharp hobby knife to cut off the nub left over from using the side cutters/nippers. Then use a blunt blade to carefully scrape off the mold lines.
3. Use 400 grit sand paper/sanding stick to smooth the scraped areas. Finish with a 600 grit to polish the part to finish.
The part is now ready to attach and prime, ready for painting.
A good clean surface of a model almost always guarantees a good final product. Remember the main key to a good final product when it comes to paint and detailing, is always the preparation, without a clean prep your end result could suffer for it.

4.) If you are a beginner in model kit building, then there is a good recommended kit for you. Heres the low-down!
We have put together a selection of tools and adhesives that are the perfect items to get you started economically and simply. The sprue cutters (side cutter/nipper) are used to cut the parts off the sprue (main frame).
The sharp knife is used to clean the nub off that is left behind from the sprue after cutting with the sprue cutters. The sanding sticks smooth the nub that you have cleaned with the knife. They are also used to smooth parts and remove any imperfections like mould lines.
Glued parts can be sanded to be level.The Mark Softer is used to soften the water slide decals so they fit snugly on the model and resemble paint when dry. It also helps the decals adhere to the model surface.
Tweezers are used to pick up small parts and also water slide decals.
The cutting mat makes your work space neat and avoids the chance of cutting your table when using the knife.The basic brush set has 3 of the most used sizes for brush painting.
