
Building and Detailing Model Aircraft Cockpits
Master the art of creating stunning scale aircraft interiors
The cockpit stands as the centrepiece of any model aircraft build, serving as a miniature testament to your skill and attention to detail. From the intricately detailed instrument panels to the precisely crafted pilot seats, a well-executed cockpit transforms a good model into an exceptional showcase piece. At Hearns Hobbies, we've seen countless builds elevated by masterfully detailed cockpits, and we're here to help you achieve the same outstanding results with your next project.
| Essential Guide Components | |
|---|---|
| Kit Selection | Choosing the ideal plastic aircraft kit and determining cockpit visibility requirements |
| Essential Tools | Paint markers, fine brushes, and specialised modelling equipment |
| Detail Enhancement | Working with photoetched parts and detail components |
| Advanced Features | Installing LED lighting and applying professional finishing techniques |
| Final Touches | Weathering effects and applying decals for authentic detailing |
1. Choosing the Right Kit
Selecting the appropriate model aircraft kit forms the foundation of a stunning cockpit build. Modern plastic aircraft kits offer unprecedented levels of detail, with manufacturers continuously pushing the boundaries of what's possible in scale modelling. When evaluating kits, consider the cockpit's visibility - whilst enclosed cockpits may require less intensive detailing, open cockpits demand meticulous attention to create a convincing scale representation.
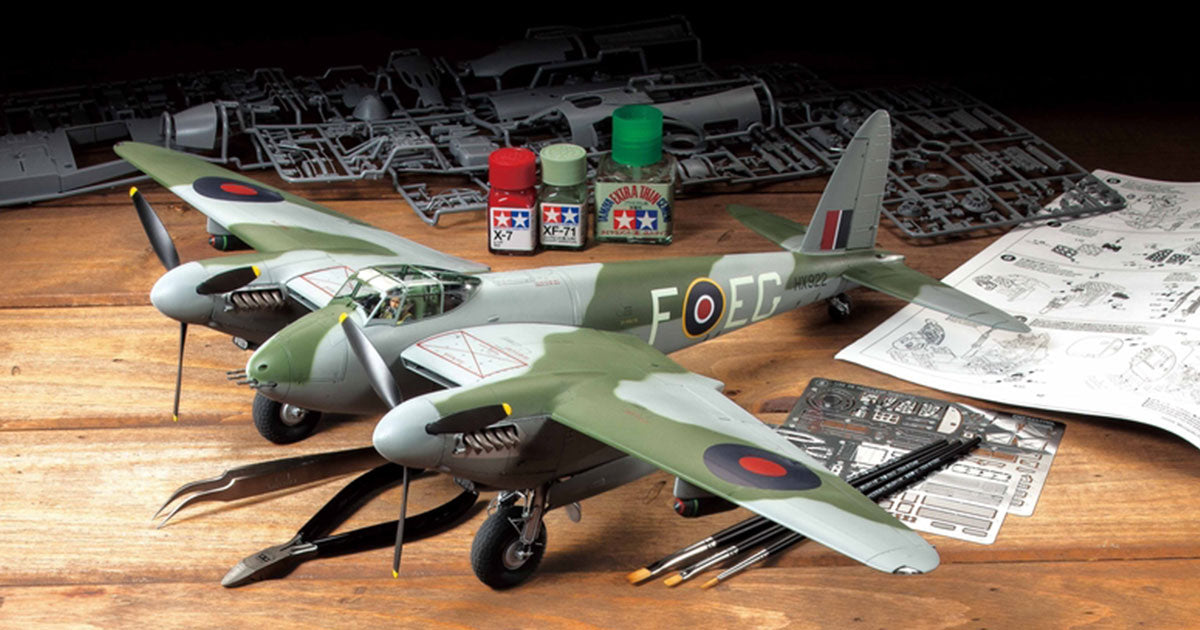
For newcomers and seasoned modellers alike, Tamiya aircraft kits represent the gold standard in terms of engineering precision and parts fit. Their cockpit components typically feature crisp moulding and accurate details, providing an excellent base for additional detailing work. Beyond the kit's supplied parts, aftermarket detail sets can dramatically enhance the final appearance of your cockpit.

1/32 De Havilland Mosquito FB Mk.VI

1/32 McDonnell F-4 C/D Phantom II
Pro Tip:
Research reference photographs of your chosen aircraft's actual cockpit before beginning construction. This invaluable resource will guide your detailing decisions and help achieve maximum authenticity.
2. Essential Tools and Materials
Assembling the right toolkit is crucial for achieving professional results in cockpit detailing. Beyond basic modelling supplies, specific tools and materials can significantly enhance your ability to create fine details and realistic finishes. High-quality paint markers prove invaluable for precise detail work, whilst photoetched parts add unparalleled refinement to your build.
| Essential Tools | Primary Use |
|---|---|
| Fine-Tipped Brushes | Precise detail painting and weathering application |
| Magnification Tools | Working with minute details and ensuring alignment |
| Specialist Tweezers | Handling and placing small components |
| Panel Line Scribing Tools | Enhancing surface detail definition |
Investment in quality tools pays dividends in the final result. A good set of fine-pointed tweezers proves essential for handling delicate decals and positioning small parts. Additionally, proper lighting and magnification equipment help prevent eye strain whilst ensuring accurate detail placement.
3. Painting Techniques
Mastering various painting techniques transforms basic plastic components into convincing scale replicas. Begin with thorough preparation, including cleaning parts with a mild detergent to remove any mould release agents that might affect paint adhesion. Priming creates an optimal surface for subsequent paint layers and helps identify any imperfections requiring attention before proceeding.
When approaching cockpit painting, consider the scale effect - colours often appear more intense on smaller objects, so slightly muting your chosen shades can achieve more realistic results. The careful application of paint markers proves particularly effective for instrument panels and switch details, whilst dry-brushing techniques excel at highlighting raised details and creating depth.
Essential Painting Steps:
- Apply a consistent primer coat
- Build up base colours gradually
- Use dry-brushing for depth and highlights
- Add precise details with fine brushes and markers
- Apply a protective clear coat to seal your work
For complex camouflage patterns or multi-toned seats, masking becomes an invaluable technique. Quality masking tape, cut to precise shapes, enables clean colour transitions and sharp lines. Consider using liquid mask for irregular shapes or complex curves, particularly useful when painting intricate cockpit details.
4. Advanced Detailing
Taking your cockpit detailing to the next level requires mastery of advanced techniques and materials. Photoetched parts represent perhaps the most significant upgrade available to model builders, offering ultra-thin metal components that replicate scale thickness far more accurately than plastic parts. These precisely engineered pieces prove particularly effective for instrument panels, seat belts, and various cockpit controls.
Incorporating LED lighting dramatically enhances the realism of your cockpit, particularly for modern aircraft displays and instrument panels. Consider using fibre optics in conjunction with LEDs to create ultra-fine light points for individual instruments. When planning lighting installations, ensure proper wire routing before sealing the fuselage halves.
Advanced Modelling Tip:
When working with photoetched parts, create a practice piece using spare material before attempting installation on your model. This helps perfect your technique without risking valuable components.
| Detail Enhancement | Application Technique |
|---|---|
| Instrument Bezels | Apply raised details using specialised detail parts |
| Cable/Wire Routing | Use fine wire or thread with appropriate paint finishing |
| Display Screens | Combine clear parts with decals and LED backlighting |
5. Finishing Touches
The final stages of cockpit completion demand careful attention to subtle details that enhance overall realism. Weathering techniques play a crucial role, particularly in military aircraft where heavy use would be evident in various wear patterns. Apply subtle washes to emphasise panel lines and recessed details, whilst dry-brushing techniques can effectively highlight raised elements.
Strategic placement of decals adds essential visual interest and authenticity to your cockpit. Modern instrument panels, in particular, benefit from carefully applied instrument face decals. Consider using setting solutions to ensure proper adhesion and eliminate silvering, particularly on textured surfaces.
Final Detailing Checklist:
- Verify all paint seams are clean and consistent
- Check decal placement and adhesion
- Apply subtle weathering effects
- Test any installed lighting systems
- Photograph your work before final assembly
Consider adding subtle environmental effects to enhance realism. Cockpit floors might show slight wear from foot traffic, whilst frequently handled controls could display paint wear revealing the base metal. For aircraft in tropical environments, slight oxidation effects can be replicated using appropriate weathering powders and paint markers.
Frequently Asked Questions
How do I choose the right paint for cockpit instruments?
For cockpit instruments, precision is key. Use paint markers for detailed work on instrument faces and switches. For larger areas, start with a dark base coat and gradually build up highlights using dry-brushing techniques. Consider using clear gloss for glass elements and instrument displays.
What's the best way to install photoetched parts in a cockpit?
To successfully install photoetched parts:
- Clean both the plastic surface and photoetched parts thoroughly
- Use specialized metal primer for better paint adhesion
- Apply cyano adhesive sparingly using a fine applicator
- Use tweezers and magnification tools for precise placement
- Consider pre-painting parts before final installation
How can I achieve realistic weathering in my cockpit?
For authentic cockpit weathering:
- Apply subtle washes to recessed areas and panel lines
- Use dry-brushing to highlight raised details and create wear patterns
- Add chipping effects to high-traffic areas like floor panels
- Apply decals before weathering for a more integrated look
- Consider the aircraft's era and service conditions when planning weathering effects
What lighting options work best for cockpit illumination?
For effective cockpit lighting, consider using LED lighting systems. Plan your wiring layout before assembly, use fiber optics for fine instrument details, and consider adding a switch for easy operation. Test all connections before sealing the fuselage to ensure proper functionality.
Conclusion
Creating a detailed scale aircraft cockpit represents the pinnacle of modeling craftsmanship, combining technical skill with artistic vision. From selecting the right plastic aircraft kit to applying the final weathering touches, each step contributes to a compelling miniature environment that tells its own story.
Success in cockpit detailing comes from careful planning, patience, and attention to detail. Whether you're working with basic kit components or enhancing your build with detail parts and lighting systems, the techniques covered in this guide provide a foundation for creating truly exceptional model aircraft interiors.
Final Thoughts:
Remember that each cockpit project presents an opportunity to refine your skills and push your modeling capabilities further. Take your time, reference historical photographs, and most importantly, enjoy the process of bringing these miniature aviation masterpieces to life. Your attention to detail in the cockpit will elevate your entire model to museum-quality status.