
Why Model Paint Changes Colour When Dry and How to Fix It
You've spent twenty minutes mixing the perfect British Racing Green for your vintage Jaguar model. It looks absolutely spot-on while wet - rich, deep, exactly matching your reference photos. You carefully apply it, step back satisfied, then return an hour later to find... is that the same colour? It's gone darker, or lighter, or just somehow wrong. Welcome to one of model painting's most infuriating mysteries.
This colour shift phenomenon drives even experienced modellers round the bend. We've watched customers at Hearns Hobbies test paint on plastic spoons, hold them up to their models while wet, declare perfect matches, then return the next day bewildered because their finished model looks nothing like they expected. The wet paint lied to them, and it happens to everyone.
The science behind this deception is actually pretty straightforward once you know it, but that doesn't make it any less annoying when you're trying to match a specific shade. Different paint types shift in different ways, and the amount of shift can vary wildly depending on factors you might never have considered - from the colour of your primer to the temperature in your workspace.
After helping modellers troubleshoot colour matching for years, we've learned the tricks that actually work. Not the forum myths or the "well it works for me" advice, but practical solutions based on understanding why acrylics, enamels, and lacquers behave the way they do. Once you understand the why, fixing the problem becomes much easier than endless trial and error.
Table of Contents
Why Paint Colours Shift When Drying
The main culprit behind colour shift is the carrier medium - the liquid that keeps pigments suspended and workable. When paint is wet, you're seeing colour through this medium, whether it's water in acrylics, mineral spirits in enamels, or lacquer thinner in lacquers. This liquid acts like a filter, changing how light interacts with the pigment particles. As it evaporates, the true colour emerges - and it's rarely what you expected.
Think of it like looking at pebbles underwater versus dry on the beach. Wet pebbles appear darker and more vibrant because water changes how light reflects off their surface. Paint works similarly. The wet carrier medium creates a temporary optical effect that disappears as the paint dries, leaving you with the actual pigment colour - which might be considerably different from what you saw initially.
Surface texture changes during drying add another layer of complexity. Wet paint is smooth and glossy, reflecting light uniformly. As it dries, microscopic texture develops - even in paints that dry "smooth" to the touch. This texture scatters light differently, affecting perceived colour. Tamiya acrylics, for instance, often develop a subtle texture that makes colours appear lighter than their wet state.
The binder - the stuff that actually holds pigment to your model - also affects final colour. As binders cure, they can yellow slightly (especially older formulations), create a semi-opaque layer over pigments, or change the paint's refractive index. This is why the same pigment can look different in Vallejo versus Humbrol paints, even when they're supposedly the same colour.
![[SUGGESTED IMAGE: Side-by-side comparison showing wet paint on a palette next to the same paint dried on a model, demonstrating visible colour shift]](https://d63oxfkn1m8sf.cloudfront.net/3000x1876/2116/7537/2250/aa0360_1.jpg%3Ffit%3D1)
How Different Paint Types Behave
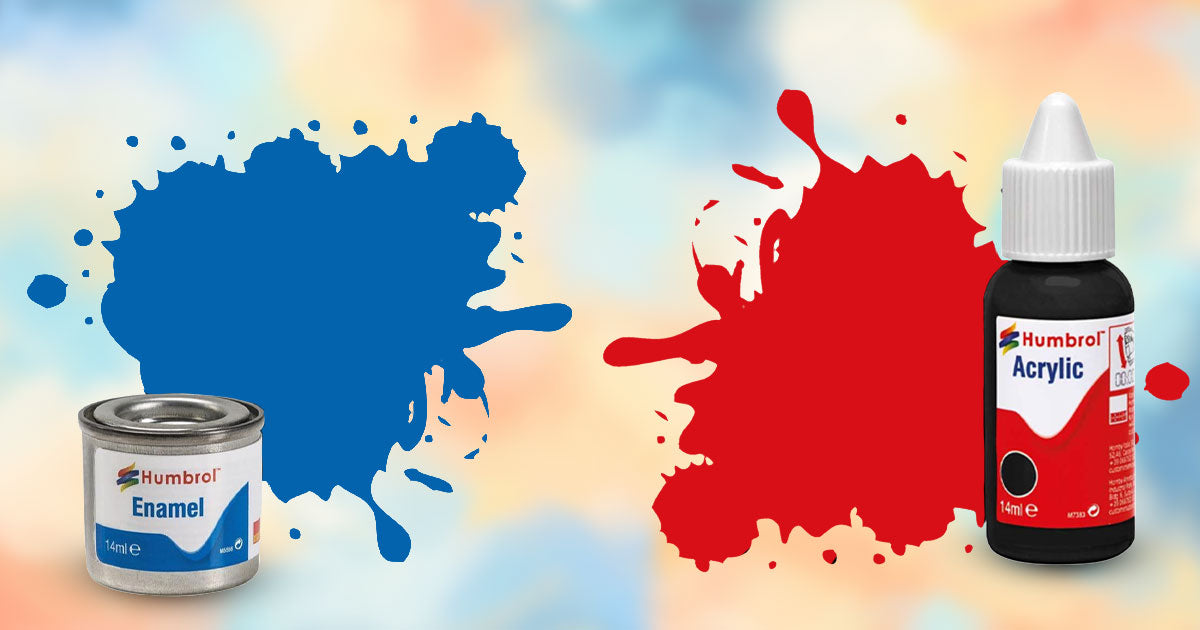
Acrylic paints are the trickiest when it comes to colour shift. Water-based acrylics typically dry lighter than they appear wet - sometimes dramatically so. Dark colours like navy blue or forest green can shift by several shades. The speed of drying affects this too; force-drying with a hairdryer often results in a different shade than air drying because rapid evaporation changes how pigments settle.
Enamel paints generally show less dramatic shifts, but they're sneakier. They might look perfect after initial drying, then continue changing slightly over days as the paint fully cures. We've seen modellers panic because their perfectly matched RAF grey looked spot-on yesterday but seems off today. That's enamel's extended curing process at work - the colour can shift subtly for up to a week.
Lacquer paints are actually the most predictable once you understand them. They tend to dry very close to their wet appearance, especially metallics. However, they're extremely sensitive to application thickness. Spray too heavy and colours darken; too light and they appear washed out. The aggressive solvents also mean that underlying colours can bleed through more than with other paint types, creating unexpected shifts.
Then there's the wildcard: spray cans. These combine paint with propellants and solvents that can cause significant colour variation. The same colour from the same can might look different on a humid day versus a dry one. Temperature affects how the paint atomises, changing both colour and finish. That Tamiya spray that gave you perfect German Grey last summer might disappoint you in winter.
Typical Colour Shift by Paint Type
| Paint Type | Typical Shift | Most Affected Colours | Predictability |
|---|---|---|---|
| Water Acrylics | Lighter when dry | Dark blues, greens, browns | Moderate |
| Alcohol Acrylics | Minimal shift | Reds, yellows | High |
| Enamels | Slightly darker | Whites, light greys | Moderate |
| Lacquers | Minimal if thin | Metallics | High if consistent |
Factors That Affect Colour Shift
Your primer choice affects final colour more than most modellers realise. Paint a bright yellow over black primer versus white, and you'll get completely different results even with full opacity. Grey primer is popular precisely because it's neutral, but even different shades of grey create variations. That's why professional modellers often specify exact primer colours in their painting guides - they know it matters.
Temperature and humidity during application and drying create surprising variations. High humidity slows drying, allowing pigments more time to settle and separate, often resulting in darker colours. Low humidity causes rapid drying that can leave colours looking chalky or faded. We've seen the same paint mix produce noticeably different shades between a humid Brisbane summer and dry Melbourne winter.
Application thickness dramatically impacts perceived colour. Thin coats dry lighter because less pigment accumulates, while thick coats appear darker but might also look uneven as pigment pools in recesses. This is particularly noticeable with washes and glazes, where the same mixture can produce vastly different effects depending on how heavily it's applied.
Surface preparation creates another variable. Sanded surfaces scatter light differently than smooth plastic, affecting colour perception. Mould release agents, if not properly cleaned, can cause paint to dry with a different sheen, changing apparent colour. Even fingerprints can create enough surface variation to cause subtle colour differences in the final paint job.
The Lighting Conspiracy
Here's something that'll mess with your head: the colour shift you're seeing might not be the paint's fault at all. Different lights render colours differently. That perfect match under your LED work lamp might look completely wrong under warm incandescent bulbs. Always check your colour matches under multiple light sources, preferably including natural daylight. Many "colour shift" problems are actually lighting problems in disguise.
Testing Methods That Actually Work
Forget testing on paper or palette - you need to test on the actual material you're painting. We keep a stash of plastic sprue specifically for paint testing. Prime it the same way as your model, apply paint using your intended method (brush, airbrush, or spray can), and let it dry completely. This gives you a true preview of the final colour, accounting for all variables.
The "step test" method works brilliantly for colour matching. Paint a small inconspicuous area of your model - inside a wheel well, under the chassis, behind a door. Let it dry completely (overnight for enamels), then check the match in various lighting. If it's off, you can adjust your mixture before committing to the entire model. Yeah, it takes patience, but less than stripping and repainting everything.
Creating a colour reference library saves endless frustration. Paint plastic spoons or flat styrene pieces with your common colours and label them with paint ratios and application notes. Include the primer colour used. After a few months, you'll have a reliable reference showing exactly how each paint shifts from wet to dry. It's like having a crystal ball for colour matching.
For critical colour matches, use the "wet edge" technique. Paint a small area, then immediately hold your mixed paint (on a palette knife or mixing stick) next to the wet paint on the model. Now wait. Watch as both dry, noting when and how they diverge. This real-time observation teaches you exactly how that specific paint behaves, information more valuable than any colour chart.
![[SUGGESTED IMAGE: A testing setup showing plastic spoons painted with various colours, labeled with paint names and mix ratios, demonstrating a colour reference system]](https://images.unsplash.com/photo-1509043990151-c2ea135dfd26?q=80&w=1170&auto=format&fit=crop&ixlib=rb-4.1.0&ixid=M3wxMjA3fDB8MHxwaG90by1wYWdlfHx8fGVufDB8fHx8fA%3D%3D)
Compensating for Known Shifts
Once you know a paint's shift pattern, you can compensate during mixing. If your dark blue acrylic consistently dries two shades lighter, mix it two shades darker than your target. Sounds simple, but it requires keeping notes. We know modellers who maintain detailed mixing journals, recording wet colour, dry result, and adjustment needed. Nerdy? Yes. Effective? Absolutely.
The "overcorrection method" works well for stubborn colours. If you need a specific green but it keeps drying too light, deliberately mix it too dark - darker than you think necessary. Apply a test patch and let it dry. Still too light? Go darker again. Eventually you'll overshoot and it'll dry too dark. Now you know the range, and can dial in the perfect wet mixture that yields your target dry colour.
For metallics, which shift unpredictably, try the "base and blend" approach. Instead of trying to nail the perfect metal shade in one go, use a slightly darker base coat, then dry-brush or carefully layer the exact metallic shade over it. The base provides depth while the top layer gives you precise colour control. This technique works especially well for Gundam builders trying to match specific mechanical finishes.
Some colours simply won't behave, no matter what you do. For these troublemakers, consider switching paint brands or types. That problematic yellow that keeps shifting might be perfect in a different manufacturer's range. We've seen modellers struggle for hours with one brand's "Desert Sand" only to nail it immediately with another brand's equivalent. Don't be loyal to paint that isn't loyal to you.
Shift Compensation Techniques
- Pre-mix darker for acrylics
- Allow for enamel curing time
- Test on actual plastic first
- Keep detailed mixing notes
- Build colours in thin layers
Emergency Fixes
- Glaze to adjust dried colour
- Selective weathering to blend
- Clear coat tint adjustment
- Strategic shadows and highlights
- Accept it as "scale colour"
Troubleshooting Extreme Colour Changes
When paint shifts dramatically - we're talking completely different colour - something's seriously wrong. Check your thinners first. Using the wrong thinner can cause chemical reactions that alter pigments. Lacquer thinner in acrylics, for instance, doesn't just thin the paint - it can actually change the colour chemistry. Always use manufacturer-recommended thinners or compatible alternatives tested on scrap first.
Old paint causes unpredictable shifts. As paint ages, components separate and degrade. That five-year-old bottle might spray the right colour initially, then shift wildly as it dries. Pigments settle, binders break down, and stabilisers fail. If a trusted colour suddenly misbehaves, check its age. Sometimes binning old paint saves more time than trying to make it work.
Contamination creates chaos. A tiny amount of incompatible paint in your airbrush can cause colour shifts, poor adhesion, or weird texture changes that affect final colour. Even cleaned tools can harbour residue that contaminates new paint. When troubleshooting mysterious colour shifts, thoroughly clean everything - brushes, airbrush, palette, even your water jar. Start completely fresh.
Reactions with underlying layers cause some of the weirdest colour shifts. Some primers contain chemicals that react with certain topcoats, causing yellowing or colour changes over time. Insufficient drying between coats can cause layers to blend chemically, creating unexpected colours. If you're seeing strange shifts, consider whether your paint layers are fighting each other.
Extreme Shift Diagnosis
| Symptom | Likely Cause | Solution |
|---|---|---|
| Yellowing whites | Old paint or wrong primer | Fresh paint, white primer base |
| Chalky appearance | Over-thinning or rapid drying | Less thinner, controlled environment |
| Colour completely different | Wrong thinner or contamination | Clean everything, correct thinner |
| Patchy colour variation | Inadequate mixing or settling | Thorough mixing, consistent application |
Professional Colour Matching Techniques
Professional modellers use a "colour ladder" system for critical matches. They create a series of samples, each slightly different, bracketing their target colour. Five mixtures, varying by small increments, painted on test pieces. Once dry, they identify which is closest and can even blend between samples for perfect matches. Time-consuming? Yes. But for competition models or exact replicas, it's worth it.
The "base layer theory" revolutionises colour matching. Instead of fighting to get the perfect colour in one coat, professionals often use a carefully chosen base that influences the final colour. A pink base under certain reds, brown under military greens, or black under metallics. The base shows through microscopically, creating depth and correcting for known shift problems. This is why some modellers swear by specific primer colours for certain projects.
Digital colour matching tools have limitations but can help. Phone apps that identify colours from photos give you a starting reference, but remember - they're seeing the shifted, dried colour. You still need to compensate for wet-to-dry changes. Some modellers photograph their wet paint and dry results, building a digital library showing the relationship. Over time, you can predict shifts by comparing new mixtures to your photo database.
Advanced modellers embrace the shift rather than fighting it. They deliberately use colour shift to create effects - mixing paint that dries lighter for natural highlighting, or darker for automatic shading. Panel lines painted with shifting colours create subtle variation that adds realism. Once you understand and predict shifts, they become another tool in your arsenal rather than an enemy to defeat.
The Scale Colour Consideration
Here's something that'll blow your mind: even if you match the exact real colour, it might look wrong on a scale model. This is "scale colour effect" - smaller objects appear darker to our eyes than full-size ones. Many experienced modellers deliberately paint slightly lighter than accurate to compensate. So that colour shift you're cursing? If it's making things a touch lighter, it might accidentally be improving your model's appearance. Sometimes mistakes are happy accidents.
Frequently Asked Questions
Why do my metallics shift colour so dramatically compared to regular paints?
Metallic paints contain actual metal flakes or mica particles that orient themselves differently as the paint dries. When wet, these particles float randomly in the carrier medium. As drying occurs, they settle and align, changing how they reflect light. The thickness of application massively affects this - thick coats allow particles to stack differently than thin coats. Additionally, airbrush application versus brush painting creates different particle orientation. Temperature during drying affects settling speed, which changes final appearance. That's why the same metallic paint can look completely different between applications. The solution? Consistent application method, controlled environment, and always test on scrap using your exact technique.
Can I add something to my paint to prevent colour shift?
Not really, no. The shift is inherent to how paint dries - you can't prevent the carrier from evaporating or stop pigments from settling. However, you can minimise shifts using specific techniques. Adding retarder to acrylics slows drying, sometimes reducing shift by allowing more even pigment distribution. Using flow improver helps paint level better, creating more consistent colour. Some modellers add tiny amounts of compatible clear medium to maintain wet appearance longer. But these are minimising techniques, not prevention. The physics of drying paint means some shift is inevitable. Your best bet remains understanding and compensating for shift rather than trying to eliminate it entirely.
Why does the same paint colour shift differently on different days?
Environmental conditions affect paint drying dramatically. Humidity changes evaporation rate - high humidity slows drying, allowing pigments to settle differently. Temperature affects both evaporation and chemical curing. Your paint's viscosity changes with temperature, affecting application thickness. Even air pressure matters for spray painting. But here's the really sneaky factor: your paint slowly changes in the bottle. Solvents evaporate even through closed lids, binders age, and pigments settle. That's why the same paint might behave differently six months later. Professional painters note environmental conditions alongside their colour recipes. Excessive? Maybe. But it explains those maddening inconsistencies when you swear you mixed the exact same colour as last time.
Is expensive paint less likely to shift colour than cheap paint?
Quality matters, but not how you'd think. Premium paints like Vallejo or Tamiya use higher-grade pigments and more stable binders, which can make shifts more predictable - not necessarily less, but more consistent. Cheap paints might use filler that affects drying, substitute pigments that behave unpredictably, or inconsistent binder ratios between batches. However, expensive doesn't guarantee no shift. Some premium paints shift significantly by design - their formulation priorities might be coverage, durability, or spray characteristics over colour stability. The real advantage of quality paint is batch consistency. Once you learn how Mr. Color Olive Drab shifts, it'll shift the same way next bottle. Cheap paint might surprise you every time.
Final Thoughts
Colour shift will never stop being annoying, but it doesn't have to ruin your projects. Understanding why paint changes from wet to dry transforms this frustration from an unpredictable enemy into a manageable characteristic. Every paint has its personality - some shift dramatically, others barely budge. Learning these personalities through testing and observation beats fighting against physics you can't change.
The modellers who produce stunning paint jobs aren't the ones who've eliminated colour shift - they're the ones who've learned to predict and compensate for it. They test religiously, keep notes, and build experience with their chosen paints. That perfect model you admired at the last show? The builder probably went through three test pieces and five mixture adjustments before nailing that colour. Now you know why.
Most importantly, don't let perfect be the enemy of good. Sometimes a slight colour shift doesn't matter. Sometimes it actually improves the model. And sometimes, after the weathering, decals, and detail work, nobody except you will notice that the green is half a shade off. Model building should be enjoyable, not an exercise in colour-matching frustration. Use these techniques when accuracy matters, relax when it doesn't.