
How to Repurpose Old Miniatures into New Characters
Transform forgotten figures into unique tabletop heroes with these simple kitbashing techniques
You'll learn how to pull apart, mix 'n match bases, body parts, and bits to give your old models new identities. We've kept everything fun and beginner-friendly, so don't stress if you've never tried this before. Throughout the guide, we'll point you to the tools and materials from our tabletop gaming range that'll help you get the most out of your kitbashing adventures.
| Repurposing Old Miniatures at a Glance | |
|---|---|
| Difficulty Level | Beginner to advanced (we'll show you where to start) |
| Time Required | 2-4 hours for assembly, additional time for painting |
| Key Materials | Old miniatures, hobby knife, plastic glue, putty, spare bits |
| Best For | Character models, hero units, unique squad leaders, custom NPCs |
Why Repurpose Old Miniatures?
Ever looked at your pile of old miniatures and wondered what to do with 'em? We've all been there. Repurposing old miniatures isn't just about being thrifty—though saving a few dollars never hurt anyone. It's about unleashing yer creative side and making something uniquely yours that'll make other players at the table go "crikey, where'd you get that?"
The hobby of miniature gaming can get expensive, especially when you're trying to build multiple armies or collect different factions. Rather than chucking out damaged models or letting duplicate figures gather dust, kitbashing gives them new purpose. This approach is particularly good for creating special characters, unit leaders, or one-off NPCs that need a distinct look.
Many Aussie gamers are sitting on a goldmine of potential without even realising it. Those leftover Kromlech bits from previous projects? Perfect for unique weapon swaps. The miniature bases from that army you abandoned? Ready for a new life. Even broken models have value—a damaged space marine might be missing an arm, but with the right bits, he could become a battle-scarred veteran with a bionic replacement.

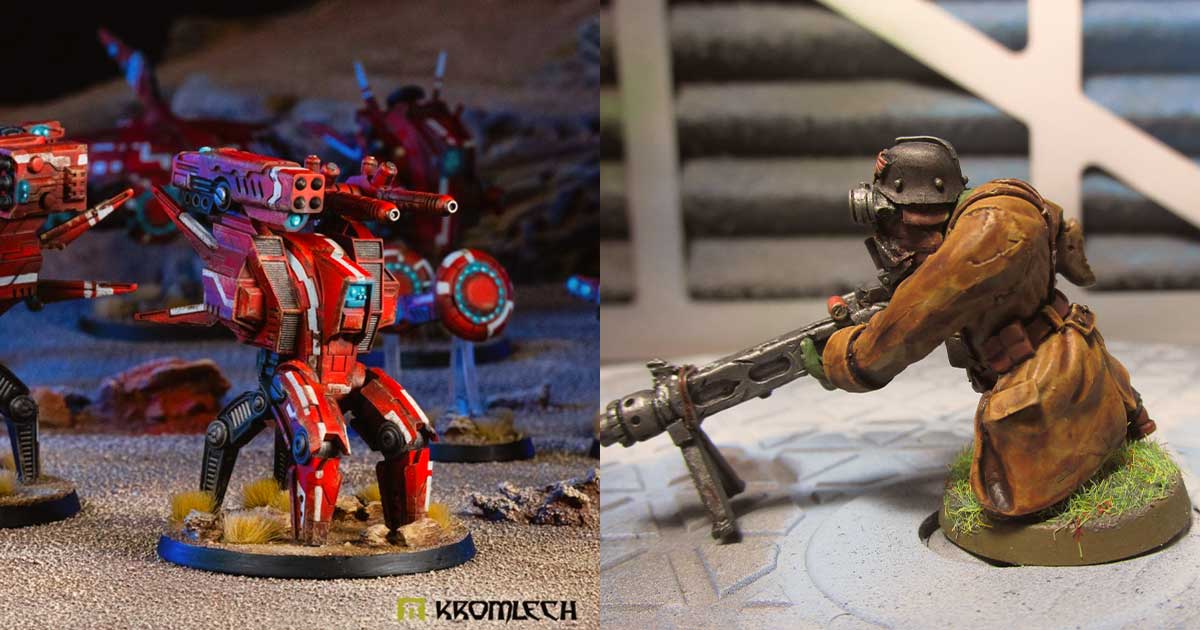
KROMLECH Caste Enclaves Barrage Battle Drone Team - perfect for kitbashing mechanical elements
There's an environmental angle too. By repurposing, you're reducing wastage and getting maximum value from the resources that went into creating those minis in the first place. It's a small thing, but every little bit helps our planet, right?
Let's not forget the most important reason: it's bloody fun! There's something deeply satisfying about taking disparate parts and creating something cohesive and characterful. It's like solving a puzzle where you make up the solution. When you're done, you'll have a model with a story—one that you crafted yourself.
Some of the most common situations where repurposing makes sense:
- You've inherited someone else's collection with models you don't need
- You've got duplicate miniatures from starter sets
- Models have been damaged during play or transport
- You want special characters but don't want to pay premium prices
- You're after a unique look that stock models don't provide
- You've switched game systems but still want to use your old figures
The best part is you don't need to be a master sculptor to get great results. With some basic hobby tools and a bit of patience, anyone can create distinctive models they'll be proud to field.
Essential Tools and Parts for Successful Kitbashing
Ya can't build a house without the right tools, and ya can't kitbash properly without the right gear either. The good news is, you probably already have most of what you need if you're into the hobby, and anything else is dead easy to get.
Let's start with the absolute basics—the tools that'll help you take apart models, trim pieces to fit, and put everything back together again. These are your kitbasher's best mates:
- Sharp Hobby Knife - Your primary tool for cutting, trimming, and scraping. Get one with replaceable blades so you always have a sharp edge.
- Fine-Tipped Clippers - Perfect for snipping off weapons and small bits without damaging them.
- Small Files - For smoothing down cut marks and rough edges after clipping.
- Pin Vice and Drill Bits - Essential for pinning components together for extra strength.
- Plastic/Super Glue - Different materials require different adhesives. Plastic glue for plastic, super glue for resin and metal.
- Green Stuff or Modelling Putty - For filling gaps and sculpting new details.
- Tweezers - Invaluable for handling tiny parts.
- Cutting Mat - Protects your work surface and extends the life of your blades.
| Essential Parts for Kitbashing | ||
|---|---|---|
| Part Type | Uses | Where to Find |
| Heads | Instant character change, faction switching | Heads Collection |
| Weapons | Change unit type or role on battlefield | Weapons Collection |
| Body Parts | Reposing, changing faction aesthetics | Body Parts Collection |
| Accessories | Character details, unit designation | Body Accessories |
| Bases | Proper mounting, game compatibility | Miniature Bases |
Now, about those parts. The beauty of kitbashing is you can use bits from any compatible kits, but there are some parts that are especially useful to have in your "bits box":
Heads: Nothing changes a character faster than swapping the head. Different helmets, bare heads with various expressions, or even alien or monstrous heads can completely transform a model. Kromlech makes fantastic alternative heads that work with many popular gaming systems.
Weapons: Changing a miniature's loadout is one of the easiest ways to repurpose it for a different role. Swapping a rifle for a sword and shield turns a ranged unit into a melee fighter. Having a variety of weapon options gives you maximum flexibility.
Shoulderpads and Armour Plates: These small details can significantly alter a model's faction identity or aesthetic. They're also usually easy to remove and replace.
Backpacks and Equipment: Adding communications gear, pouches, or tech equipment can change a standard trooper into a specialist unit.
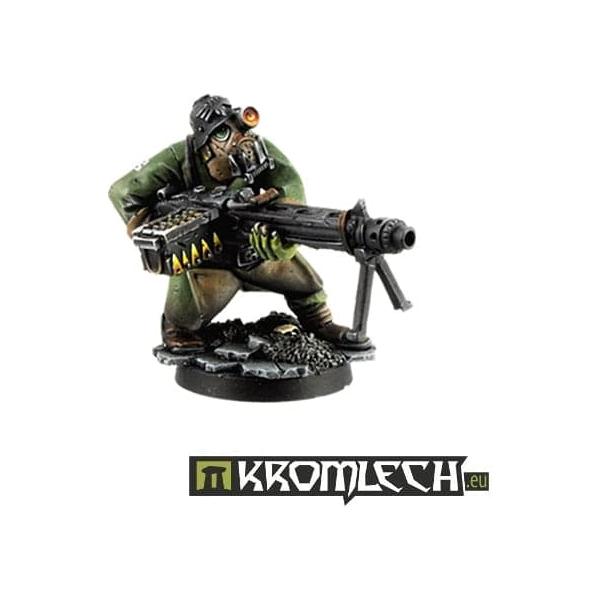
KROMLECH Orc Greatcoat MG42 Gunner - Rich in unique bits for kitbashing
Scenic Bits: Small items like crates, barrels, skulls, or tech components can add character to both the model and its base.
A little trick I've learned over the years: Don't throw away sprues until you've snipped off any useful generic parts like pipes, cables, or panels. These bits often come in handy for adding detail or filling awkward gaps in conversions.
If you're just starting out and don't have a collection of bits yet, consider picking up a bits box starter or looking for specific conversion bits that match the theme you're going for. Some companies even sell dedicated conversion kits designed specifically for kitbashing.
Remember, compatibility between parts from different manufacturers isn't always perfect. You might need to do some trimming or gap-filling to make everything fit properly, but that's all part of the creative process!
Planning Your Character Build
Planning makes perfect, mate—especially when it comes to kitbashing. Before you start hackin' away at your models, take a bit of time to think about what you're trying to create. A little forethought can save you loads of headaches (and sometimes expensive mistakes).
Start by asking yourself these questions:
- What's the purpose of this model? Is it a hero unit, a squad leader, or just a unique trooper to add variety?
- What game system will it be used in? This affects base size, scale, and equipment options.
- What's the character's backstory or role? This helps guide your aesthetic choices.
- What parts do you already have available? Work with what you've got before buying new bits.
It's dead useful to sketch your idea or at least make notes about which parts will go where. If you're not much of an artist, don't stress—even rough stick figures with notes can help you visualise the end result.
Base selection is crucial and often overlooked. The right base not only ensures your model is game-legal but also provides a foundation for your character's story. A hero deserves a more elaborate base than a standard trooper. Consider using scenic bases or adding terrain elements to enhance the narrative.
Pro Tip:
Always check the scale of different model ranges before combining them. A "heroic 28mm" Space Marine will look odd alongside a "true scale 28mm" historical figure. When in doubt, compare the head sizes—they're usually the best indicator of compatibility.
When selecting parts, think about visual balance. A top-heavy model with tiny legs will look awkward and might be unstable. Similarly, a character with oversized weapons needs a pose that looks like they can actually carry that weight.
Consider the silhouette of your character too. A distinctive outline makes your model instantly recognisable on the tabletop. This is particularly important for gaming pieces where quick identification matters.
For poses, dry-fitting is your best mate. Hold the parts together without glue to see how they look from different angles. Take photos with your phone if needed—sometimes a picture reveals balance issues you didn't notice while handling the model.
Some kitbashers create a "parts palette" before starting—laying out all the components they might use and then mixing and matching until they find combinations they like. This approach can spark unexpected creative ideas!
If you're working on a unit rather than a single character, decide how uniform you want them to be. Varying poses while maintaining consistent equipment can create a cohesive yet dynamic squad.
Remember that kitbashing isn't just about function—it's about creating a narrative. Each modification tells part of your character's story. A bionic arm suggests past injuries, trophy skulls indicate a warrior culture, and additional armour plates might show a veteran status.
Step-by-Step Kitbashing Process
Right, let's get stuck into the actual kitbashing process. This is where the rubber hits the road and your vision starts to take shape. I'll break it down into manageable steps so you don't get overwhelmed.
Step 1: Disassembly and Preparation
If you're working with already-built models, you'll need to carefully take them apart first:
- For plastic models, use clippers to cut through any glued joints, trying to preserve as much material as possible.
- For metal or resin models, you might need to soak them in simple green or another model stripping agent to loosen old superglue.
- Sand down any rough cut marks and clean the parts thoroughly to remove dust, old paint, or release agent.
If your minis are still on sprues, congratulations—you've skipped a tricky step!
Step 2: Test Fitting
Before reaching for the glue, test how everything fits together:
- Try different combinations of body parts to find the most natural-looking pose.
- Check that weapons and accessories sit comfortably in hands or on attachment points.
- Make sure the model will stand stably on its base.
Take photos from multiple angles during this stage. What looks good from the front might look awkward from the side.
Step 3: Modifications
Now comes the creative bit where you actually modify the parts to fit your vision:
- Cutting and Reshaping: Use your hobby knife and clippers to remove unwanted details or cut parts at new angles for dynamic poses.
- Drilling: Use your pin vice to drill holes where you'll need to add pins for structural support, especially for heavy or extended parts.
- Pinning: Insert small lengths of paper clip or wire into drilled holes to strengthen joins between parts.
- Gap Filling: Use green stuff or modelling putty to fill gaps between parts that don't perfectly match.
- Adding Details: This is where you can get really creative—add straps, pouches, cables, or custom details sculpted from putty.
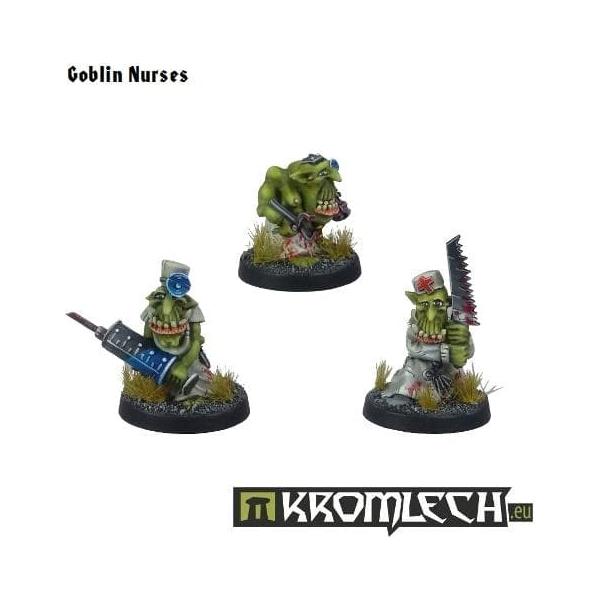
KROMLECH Goblin Nurses - Unique character models that provide excellent bits for unusual kitbashing projects
Step 4: Assembly
With all your modifications complete, it's time to put everything together:
- Start with the largest parts—usually the torso and legs—and work outward.
- Use the appropriate glue for your materials:
- Plastic cement for plastic-to-plastic joins
- Superglue for metal, resin, or mixed-material joins
- Allow each major joint to dry completely before moving on to the next one.
- Use elastic bands or hobby clamps to hold parts in position while the glue sets.
- Attach smaller details and accessories last to avoid knocking them off while handling the model.
Step 5: Base Construction
The base is your model's stage—make it count:
- Decide on a theme that complements your character's story.
- Add texture using basing materials like sand, small stones, or textured paste.
- Consider the model's stance and ensure good contact points for secure attachment.
- Create visual interest with different levels or small scenic elements.
| Common Problem | Solution |
|---|---|
| Parts don't fit together | Sand or trim contact points until they match, or create custom connector pieces with putty |
| Model is unstable or top-heavy | Add hidden support pins or adjust the pose to lower the center of gravity |
| Visible gaps between parts | Fill with green stuff and texture to match surrounding areas |
| Details look out of scale | Replace with appropriate-sized alternatives or modify with putty |
Remember, kitbashing is an art, not a science. Every project will present unique challenges, and solving those problems is part of the fun. Don't be afraid to step back, reassess, or even start over if something isn't working. The most important thing is to enjoy the creative process.
Adding Finishing Touches
The final steps can make or break your kitbashed creation. This is where your repurposed mini really comes to life and starts telling its story. Let's get it looking mint!
Prepping for Paint
Before you grab your paintbrushes, there's a bit of prep work needed:
- Fill any remaining small gaps with modelling putty.
- Sand down any obvious seams where parts join.
- Check for mould lines you might have missed earlier.
- Give your model a gentle wash with soapy water to remove any finger oils or dust.
A good base coat is crucial. Use a quality primer that suits your primary material—plastic, metal, or resin all have different properties. Spray primers give the smoothest finish, but brush-on primers work well for smaller projects or detail work.
Painting Strategies
Your kitbashed model deserves a thoughtful paint scheme:
- Consider using a paint scheme that unifies disparate parts—colour creates cohesion.
- Pay extra attention to transition areas where different bits meet.
- Use weathering to disguise joins and add character.
- Add battle damage or wear patterns that tell your character's story.
Don't be afraid to try new painting techniques. A kitbashed model is already unique, so it's the perfect canvas for experimenting with effects like object source lighting, rust, or glowing elements.
When painting repurposed models, think about their history. A warrior who's survived many battles might have faded colours in some areas, fresh paint in others, and collection of battle scars. These details add depth to your character's story.
Basing Excellence
The base is your model's foundation in more ways than one:
- Choose basing materials that complement your character's theme.
- Consider the environment where your character would logically be found.
- Use the base to tell more of the story—discarded equipment, fallen enemies, or environmental features all add narrative.
- Make sure the colours on the base don't compete with the model itself.
For gaming pieces, remember that the base needs to be appropriate for the system you're playing. Most games have specific base size requirements, so check those before you get too creative.
Final Details and Weathering
Small touches make a big difference:
- Add transfers or decals for faction markings or unit insignia.
- Apply a controlled wash in recessed areas to enhance details.
- Consider edge highlighting to make details pop.
- Use weathering powders or pigments to add dust, dirt, or environmental effects.
- Add blood splatter for battle-worn warriors or rust effects for old machinery.
Protection
After all that work, protect your creation:
- Apply a quality varnish to seal your paintwork.
- Consider different finishes for different areas—matte for cloth and leather, satin for armour, and gloss for gems or wet areas.
- If your model will see tabletop action, consider a slightly tougher varnish coat on vulnerable protruding bits.
The beauty of kitbashed models is that they continue to evolve. Don't be afraid to go back and add more details or touch up areas as your vision for the character develops. Some of my best kitbashes have had details added months after I thought they were "finished"!
Display and Gaming with Your Repurposed Miniatures
Now that you've created something unique, it's time to show it off! Whether your kitbashed miniature is destined for the gaming table or a display cabinet, there are ways to make sure it gets the attention it deserves.
Gaming with Custom Characters
Using your repurposed miniatures in games adds a whole new level of personal investment:
- Rules Compatibility: Make sure your character conforms to the game system's requirements. Most mates won't mind a creative proxy, but tournament play might have stricter requirements.
- Base Consistency: Keep your bases consistent with the rest of your army to maintain a cohesive look.
- Character Sheets: For RPG characters, create custom character sheets that reflect the unique nature of your model.
- Special Rules: Consider creating narrative play rules that reflect the unique aspects of your kitbashed character.
There's something special about watching your custom creation lead your forces to victory or make that crucial last stand. These models often become favorites not just because they look cool, but because they collect battle stories over time.
Creating Effective Displays
If your kitbashed miniature is more of a showcase piece, give it the display it deserves:
- Individual Cases: Small display cases with good lighting can really make a special character pop.
- Dioramas: Consider creating a mini-scene that tells more of your character's story.
- Lighting: Directional lighting can enhance the drama and highlight your best paintwork.
- Rotating Displays: If you have multiple showcase pieces, consider a rotating display so different models get their time in the spotlight.
| Display Options Comparison | |
|---|---|
| Display Type | Best For |
| Glass Cabinet | Large collections, dust protection, viewing from multiple angles |
| Individual Acrylic Case | Special character models, competition entries, detailed paintwork |
| Diorama | Narrative pieces, scene recreation, multiple related models |
| Wall-Mounted Display | Space-saving, dramatic presentation, themed collections |
Photography
Capturing good images of your creations lets you share them with the wider hobby community:
- Use a simple light box to eliminate harsh shadows.
- Take photos from multiple angles to showcase different aspects of your conversion.
- Close-ups of particularly successful conversion points can help inspire others.
- Consider before-and-after shots to show the transformation.
- Share your work on hobby forums or social media to get feedback and inspire others.
Maintenance
Keep your kitbashed creations looking their best:
- Regular gentle dusting with a soft makeup brush.
- Touch up paint chips on gaming models.
- Keep display pieces out of direct sunlight to prevent color fading.
- Handle by the base to avoid damaging delicate parts or paintwork.
Building a Narrative
One of the best things about kitbashed characters is the stories they can tell:
- Create a backstory that explains unique features of your conversion.
- Use your character in narrative campaigns where their unique appearance can be part of the storyline.
- Build supporting characters or rivals that share design elements.
- Consider creating a "before" model if your character has undergone a dramatic transformation in your game's narrative.
Remember that your kitbashed miniatures are conversation starters. They draw attention and questions at gaming tables and hobby meetings. Each question is an opportunity to share your creative process and inspire other hobbyists to try their hand at repurposing old models.
Inspiration and Additional Resources
Finding inspiration for your next kitbashing project isn't hard—it's everywhere! From movies and games to history books and even real life, creative ideas are just waiting to be discovered. Here's where to look when you need that spark of inspiration:
Community Resources
The hobby community is your best resource for ideas and techniques:
- Hobby Forums: Websites like Hearns Hobbies Blog feature tutorials and showcases from experienced kitbashers.
- Social Media: Instagram hashtags like #kitbash or #miniatureconversion are goldmines of creative ideas.
- Local Gaming Clubs: Nothing beats seeing creative conversions in person and chatting with their creators.
- Online Tutorials: Video tutorials can walk you through specific techniques step-by-step.
Don't be shy about asking questions. Most hobbyists are happy to share their methods and tricks with newcomers.
Specific Themes and Ideas
Looking for a starting point? Here are some popular kitbashing themes:
- Battle-Damaged Veterans: Add scars, bandages, and makeshift repairs to standard troops.
- Faction Crossovers: Combine elements from different armies to create renegades or mercenaries.
- Environmental Adaptations: Modify troops with gear suited to specific environments like desert, snow, or urban settings.
- Leadership Upgrades: Transform regular troops into sergeants or captains with additional details and commanding poses.
- Monster Hunters: Add trophies, specialized weapons, and rugged equipment to create dedicated monster-slaying units.
Inspiration Tip:
Looking for a fun challenge? Try the "bits box lottery" where you randomly select 3-5 components from your bits collection and challenge yourself to create a cohesive character using only those parts plus one base model.
Finding Compatible Parts
Not all bits work well together, but these combinations are typically reliable:
- Kromlech makes fantastic alternative heads and weapons that work with many popular science fiction wargaming systems.
- Historical and fantasy ranges often have compatible scales if you're careful about selecting pieces.
- Vehicle accessories can often be repurposed as science fiction equipment or mechanical components.
When in doubt about compatibility, look for conversion bits specifically designed to bridge the gap between different model ranges.
Books and Digital Resources
Beyond the physical bits, these resources can expand your kitbashing horizons:
- Art books from your favorite games or movies
- Military history references for authentic equipment and poses
Frequently Asked Questions
Can I mix parts from different manufacturers?
Too right you can! Just keep an eye on scale differences between ranges. Different manufacturers use slightly different proportions, so compare head sizes if you're unsure—they're usually the best indicator of compatibility. You might need to do a bit of trimming or gap-filling with Green Stuff, but that's all part of the creative process. Our Kromlech bits are designed to work with many popular gaming systems, making them perfect for cross-range kitbashing.
How do I remove parts from assembled minis without damaging them?
For plastic models, use sharp clippers to carefully cut through glued joints, preserving as much material as possible. If you're dealing with metal or resin minis, try soaking them in Simple Green or another model stripping agent to loosen old superglue. Go slow and be patient—rushing usually leads to broken bits! For stubborn joints, you might need to use a hobby saw or carefully apply heat with a hairdryer to soften the glue before attempting removal.
What's the best way to strengthen joints on kitbashed models?
Pinning is your best mate for creating rock-solid joins on your kitbashed creations:
- Drill small holes into both parts using a pin vice
- Cut a piece of paperclip wire slightly shorter than the combined depth of your holes
- Apply a dab of superglue to the holes and insert the wire
- Join the parts together and hold until the glue sets
- For extra strength, add a small amount of Green Stuff around the join
This technique is especially important for top-heavy conversions or models that'll see regular tabletop action. For more heavy-duty jobs, check out our model tools collection.
How do I make my kitbashed model look cohesive?
The paint job does most of the heavy lifting here, mate! Use a unified colour scheme across all components to tie everything together visually. Pay extra attention to transition areas where different bits meet, using weathering techniques to disguise joins. Adding battle damage or environmental effects can also help blend disparate parts into a cohesive whole. Don't forget to tell a story with your paint job—think about your character's history and let that guide your weathering and detail work.
Conclusion
Kitbashing and repurposing old miniatures isn't just a money-saver—it's a creative adventure that'll have you looking at your bits box in a whole new light. There's something deeply satisfying about transforming forgotten figures into unique characters with stories all their own. Whether you're creating a battle-scarred veteran from spare parts or converting that duplicate hero into something completely different, you're adding a personal touch to your collection that no off-the-shelf model can match.
The techniques we've explored—from careful disassembly to thoughtful reassembly, clever modifications to artistic finishing touches—open up endless possibilities for your tabletop adventures. Remember, there are no hard rules in kitbashing beyond what works for you and your gaming needs. Some of the most inspiring conversions come from experimenting and pushing boundaries.
Final Thoughts:
Every kitbashed mini tells two stories—the narrative you've created for the character and the tale of your own creative journey in bringing them to life. So grab your hobby knife, dig through that pile of old miniatures, and start creating something uniquely yours. Your gaming table (and your wallet) will thank you for it! And remember, we'd love to see what you create—share your kitbashing projects with us on social media or pop into the shop to show off your handiwork. Happy kitbashing!